• Skip to primary navigation
  • Skip to main content
  • Skip to primary sidebar
  • Skip to footer

BJU Press Blog

  • Home
  • Shop
    • Shaping Worldview
  • Simplified Homeschool
  • Successful Learning

STEM

STEM Activities and Real-World Learning

June 25, 2019 by Jenna

stem activities and real world learning
Have you ever considered how no single career your child could pursue leads back to just one subject? An artist draws on knowledge gained in both math and literature classes, a historian uses skills learned in science class as well as in heritage studies classes, and an astronomer needs strong foundations in both math and science to be successful. Even as a writer, I find myself drawing on skills from all subject areas to do my job well. That’s why interdisciplinary studies—studies covering several subjects—are so important in education. And STEM in particular is a big deal for parents and teachers alike. Let’s take a closer look at the world of STEM learning and what your children get from these activities.

What Is STEM?

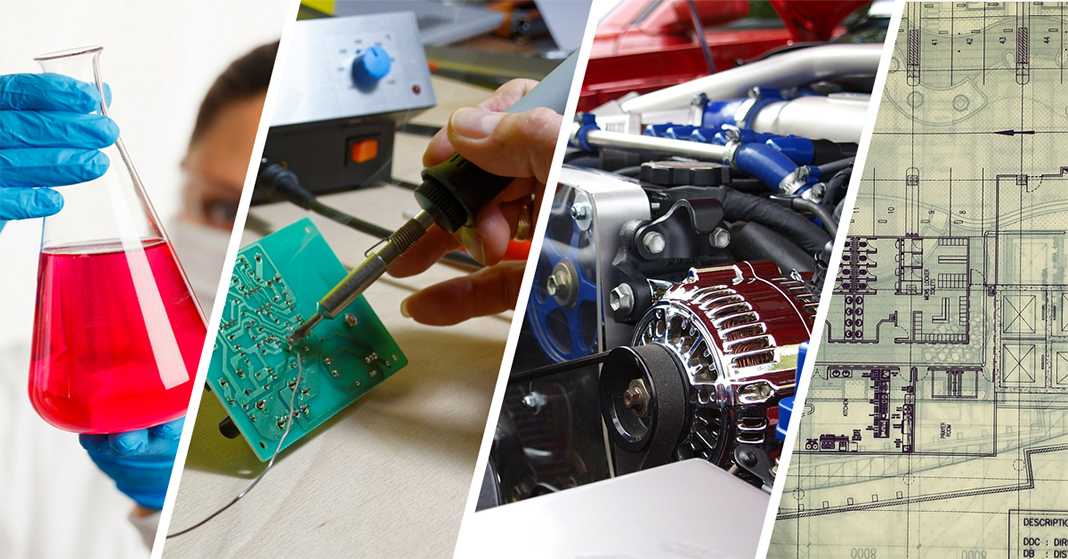
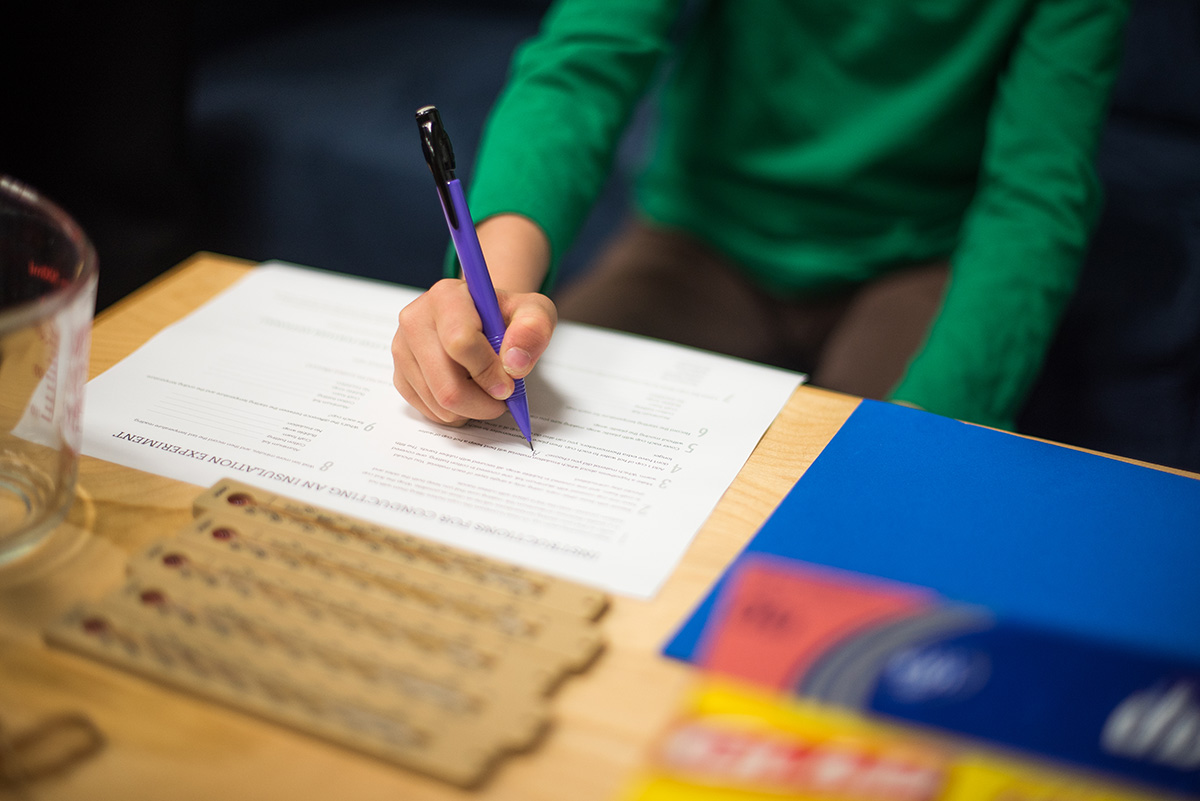
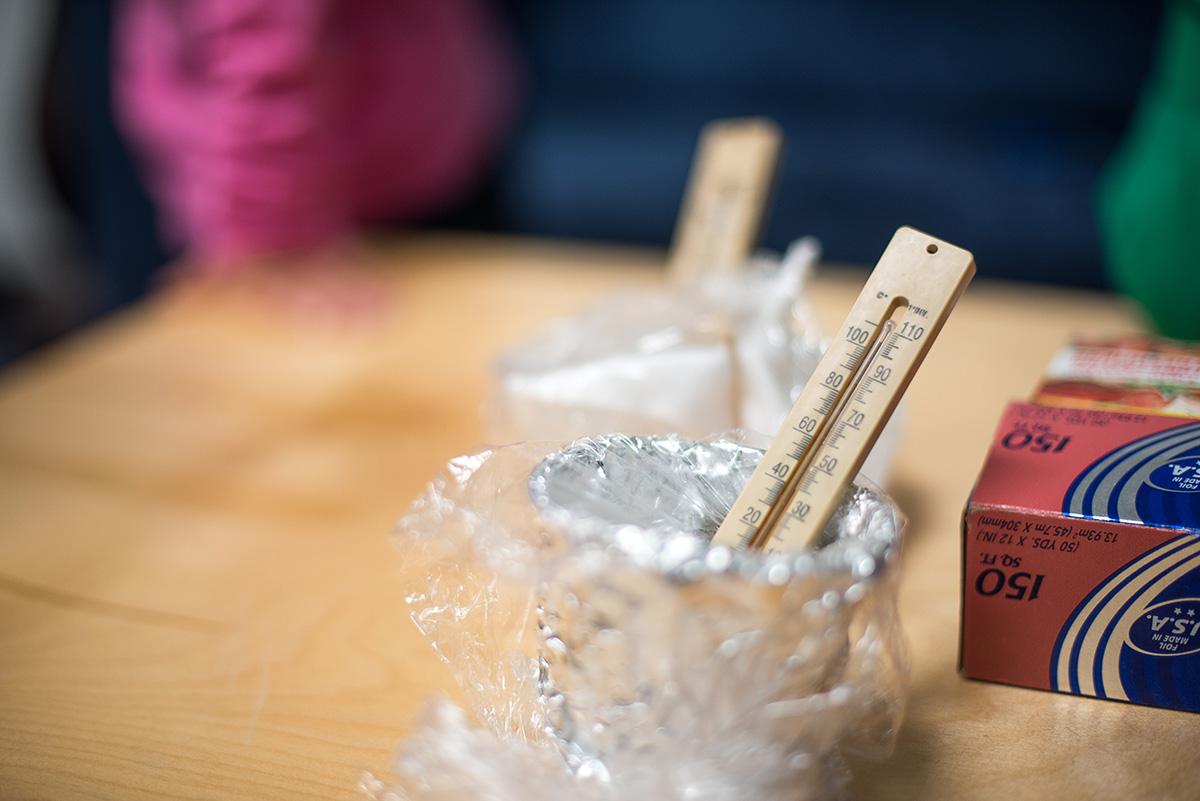
STEM is an acronym for Science, Technology, Engineering, and Mathematics. You might also hear it called STEAM, which simply adds Art (or the arts) into the mix. But STEM and STEAM aren’t all that different because design is an inherent part in every such activity. STEM activities require students to use their knowledge in each area to complete a task or to solve a problem. For example, consider this activity for building a better thermos. Designed for high school students, the exercise is similar to an insulation experiment in Science 5. To complete it, students need to know something about heat and energy, they need to use technology resources to craft their container, they need to understand principles of engineering and design to make their container practical and functional, and they need math skills to measure the components and test the container.

Why Include STEM Activities?

STEM activities are a chance for your kids to apply otherwise isolated skills to real-world situations. In other words, it’s the reason your students have been learning all those weird math formulas and science facts. It’s one thing to learn how to calculate the surface area of an object in math and to understand how different materials and sound waves interact in science. It’s quite another to apply that knowledge to designing something to amplify sound coming from a small speaker. But doing STEM activities goes beyond simply applying skills.

STEM activities also help your children to understand what they can do. As Christians, we are called to be responsible caretakers of God’s creation. How can we take hold of that responsibility? What can we do for the world? The simple act of creating something that is useful and serves a purpose can help children to understand what they are capable of doing as human beings created in God’s image. God didn’t create some people to be geniuses who solve all of the problems and the rest of us to muddle through as best we can. God has given each of us tools to accomplish His will—whether in caring for His flock or His creation. STEM activities help your children to see how—through study and a bit of hard work—they can do some pretty cool things.

Does this mean that now you have to go and find a whole bunch of STEM activities to add to your lesson plans? Not at all. Chances are, many of your science and math activities already include elements of STEM, even if they’re not labeled as STEM activities. Just take the time with each activity to let your students learn everything they need to.
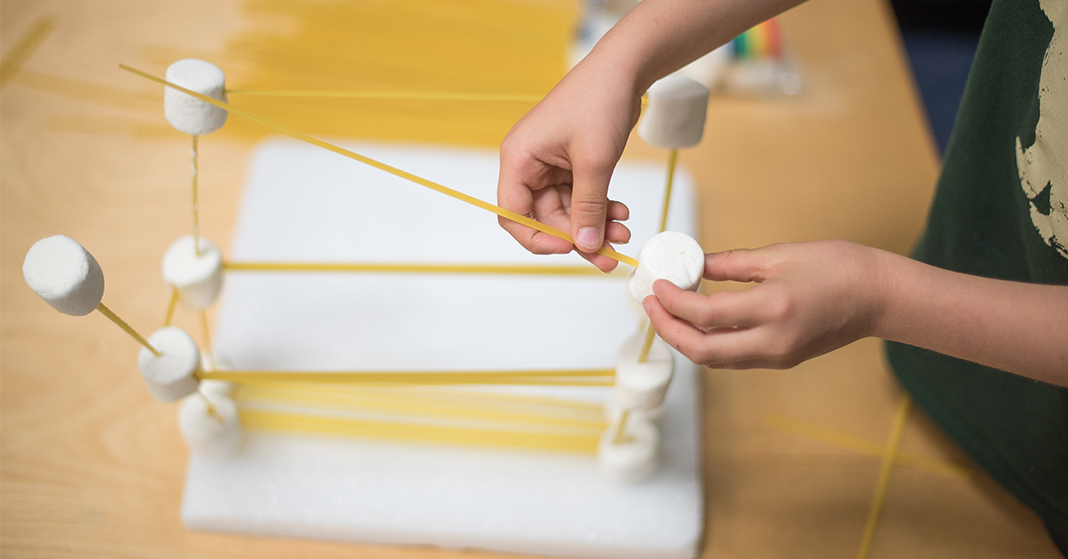
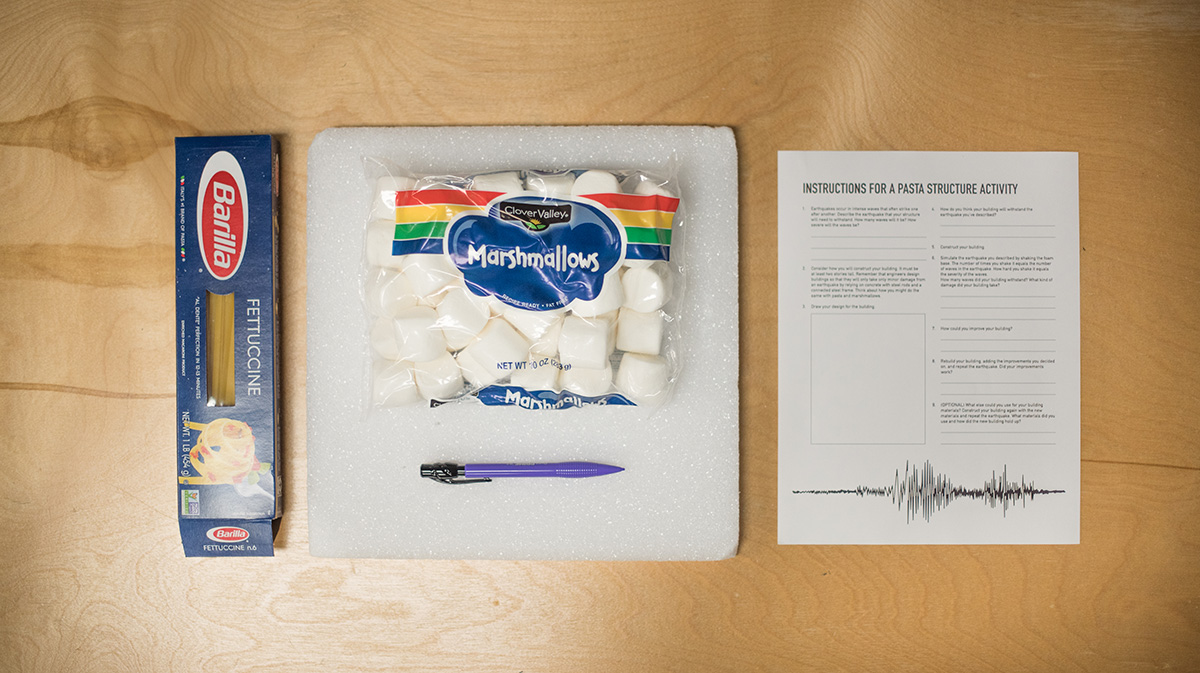
Filed Under: Successful Learning Tagged With: homeschool, science, STEM, STEM activities

Sixth-Grade Pasta Structure Activity

May 31, 2018 by Jenna

pasta structure
As your kids grow older, they become more and more capable of understanding complicated concepts. During a discussion about earthquakes, they are fully capable of understanding why it’s important for engineers to construct buildings that will withstand an earthquake. Structural engineers are responsible for the lives and safety of the people that use the buildings they create. They exercise dominion when they plan carefully and use the best materials in their buildings. Your children may not be quite ready to dive into structural engineering, but they can apply their knowledge of earthquakes to a small structure with a simple experiment. In the Science 6 Teacher’s Edition, you will find an activity for constructing a structure out of pasta noodles and marshmallows. How well will their pasta structure stand up against an earthquake?

Materials for the Pasta Structure Activity

  • 1 bag large marshmallows
  • 1 box fettuccine noodles
  • Foam base, approximately 8 in x 10 in (can be Styrofoam or other stiff foam)

pasta structure materialsDoing the Activity

The goal is to design a structure that can withstand the force of an “earthquake.” And we’ll do it with just pasta and marshmallows. Your child will need to determine the number of waves in the earthquake and the severity of the waves her structure must survive. In order to simulate the earthquake, she will need to shake the foam base her building rests on. The number of times she shakes it represents the number of waves in the earthquake. How hard she shakes it represents the severity of the waves.

  1. Print out the pasta construction activity handout and have your child describe the earthquake her structure must survive. Have her complete items 1–4 on the handout before starting construction.pasta structure handout
  2. Have her construct a building out of marshmallows and pasta with the foam base as the foundation. Her building should be at least two stories tall. She should consider the materials she’s using, the shape of her building, and how high it will be. All of these factors will affect how well her building will stand.
  3. Once she’s finished her pasta construction, she should simulate the earthquake she has described by shaking the foam base.pasta structure earthquake 1pasta structure fallen
  4. Ask, “Did your building stay up? How many shakes was it able to take before it collapsed? What kind of damage did the earthquake do? Can you improve your design so that it will be able to survive the earthquake?” She should record on the handout any ideas she has for improvements to the structure.
  5. Have her repeat the experiment, applying her ideas for improvements. Ask, “Did the improvements make the structure better? Did it last longer during the earthquake?”

second pasta structurepasta structure staying up
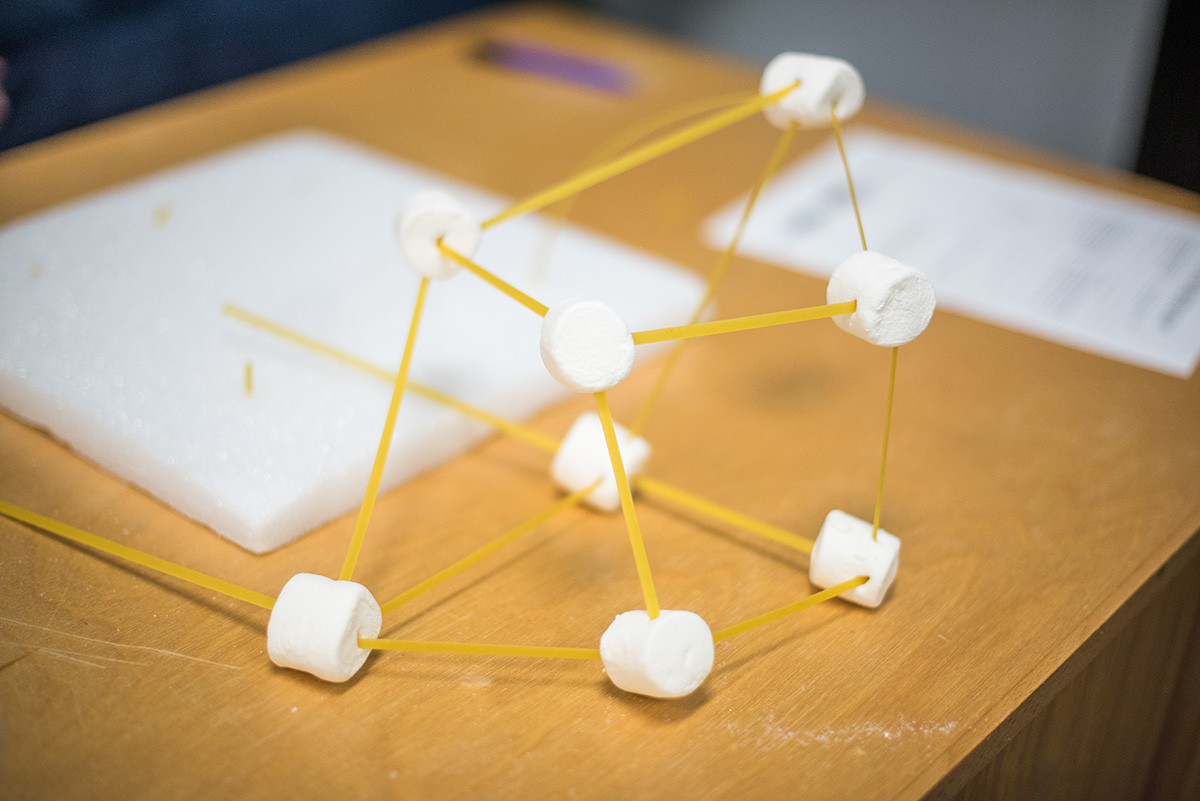
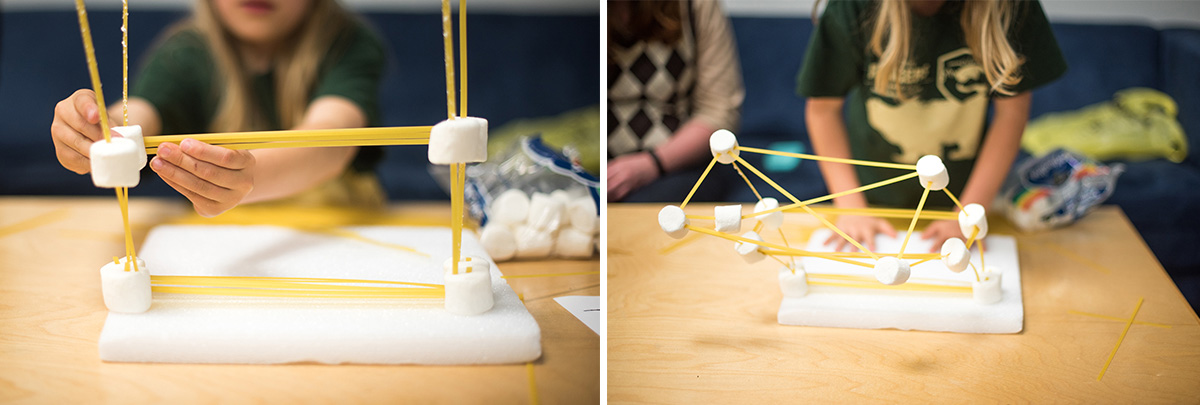
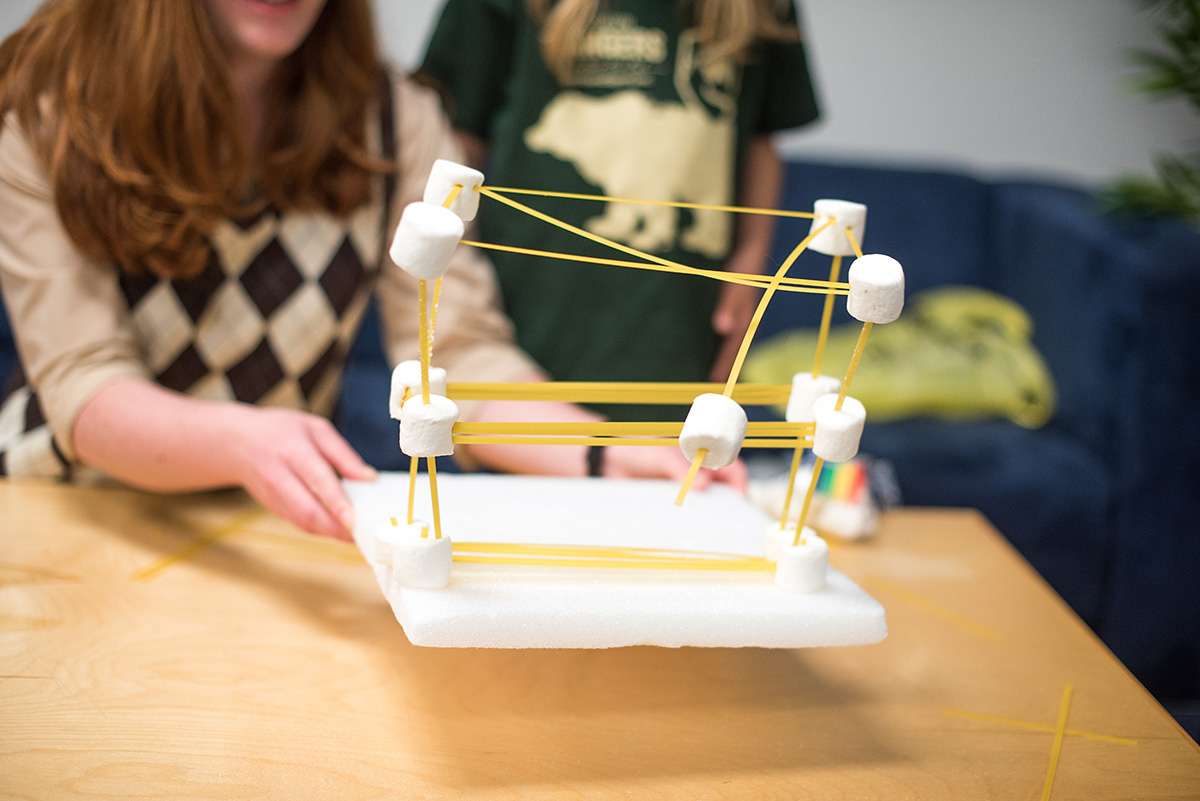
Taking It a Step Further

  1. Ask, “What other materials could be used for construction?” If you have the materials on hand, have her repeat the experiment and compare the new materials to the old ones.

This would be a great activity for siblings to work together on. Put your sixth grader in charge of construction and have younger and older ones follow her directions. She will need to exercise both listening and communication skills as she shapes her building.

Filed Under: Successful Learning Tagged With: earthquake science, engineering, homeschool science, pasta construction, STEM

Experimenting with Insulation in Fifth Grade

May 3, 2018 by Jenna

insulation cover
If you’re like a lot of homeschool moms, you probably rely on your morning coffee or tea to get yourself going. Ever noticed that if you don’t finish it within ten minutes or so, it goes cold—unless you use an insulated cup or thermos? Insulation has become a key feature in our modern-day lives. It keeps our houses warm in winter and cool in summer. It keeps our refrigerators cold on the inside and not the outside. It’s also a part of God’s design in warm-blooded creatures that live in cold regions, such as polar bears and whales.

A great way for your fifth grader to understand how insulation works is to test different types of materials to see how well they insulate a warm substance. In this activity from the Science 5 Teacher’s Edition, you and your child will try to keep a cup of hot water warm.

Materials Needed for Insulation Activity

  • 5 plastic cups, 9 oz
  • Cotton batting, 1 square foot
  • Rubber bands, 5 or more
  • Craft foam, 1 sheet
  • Bubble Wrap®, 1 square foot
  • Aluminum foil, 1 square foot
  • Hot water
  • 1 cup measuring cup
  • 5 thermometers
  • Plastic wrap, 1 roll
  • Insulation experiment printable
  • Ice water (optional)

insulation experiment materials
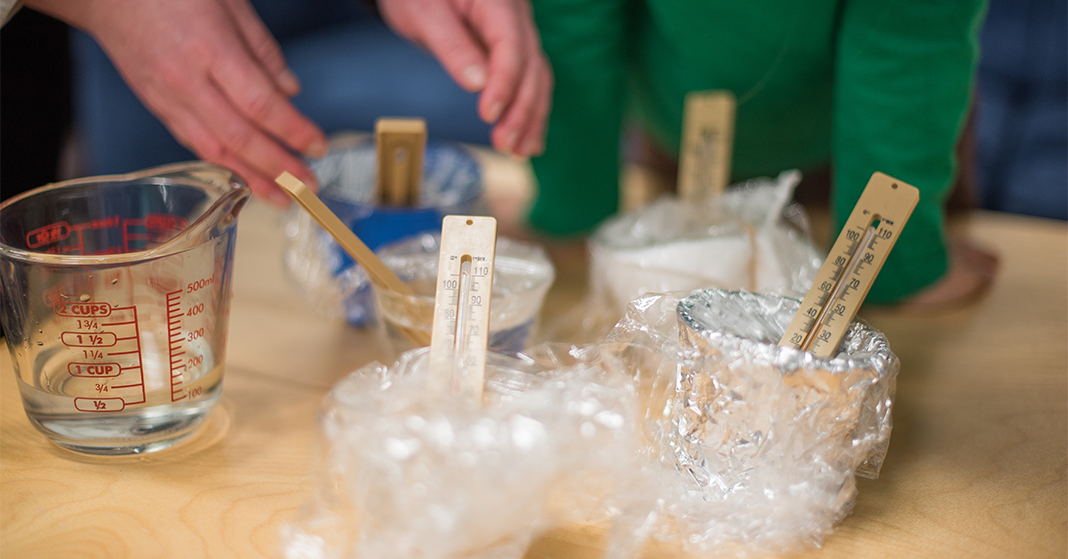
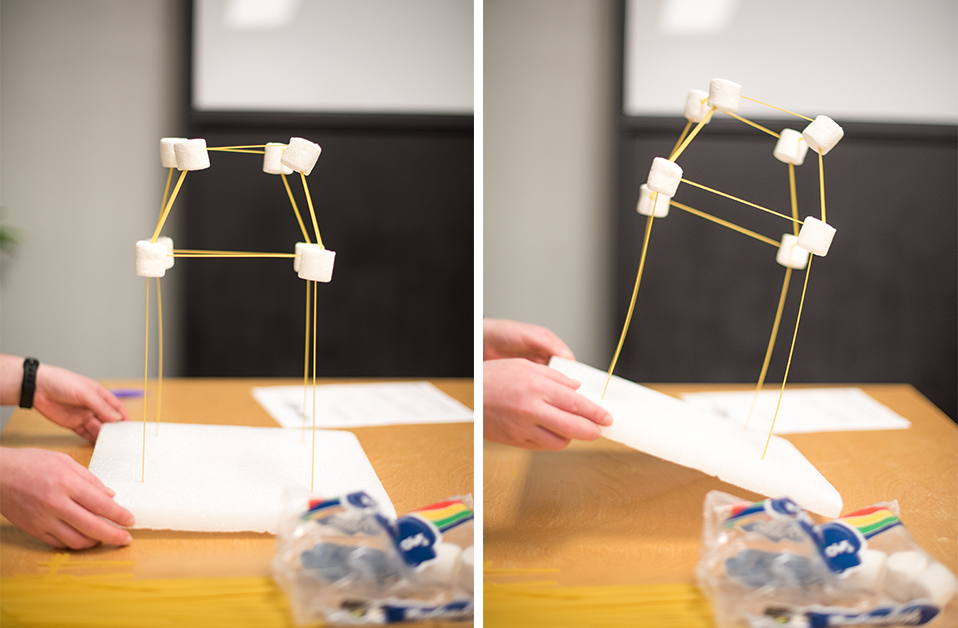
Conducting the Experiment

Direct your child to follow the directions on the handout, or give the following instructions orally.

  1. Prepare four cups as follows (the fifth will have no insulation):
    (a) Wrap cotton batting around the first cup, making sure you cover the bottom as well. Use rubber bands to keep the insulating material in place. Position the rubber bands vertically rather than horizontally so they don’t slip off easily.
    (b) Wrap the second cup with craft foam the same way.
    (c) Use bubble wrap to insulate the third cup.
    (d) For the fourth cup, use a double thickness of aluminum foil. (Use two layers because foils is much thinner than the other materials.)
    It’s important to have all five cups ready before filling them with hot water so that the starting temperatures will be practically the same.insulation cutting materialsinsulation covering cups
  2. Now predict which insulation material will best keep water in the cup hot. Write your answer on the handout.
  3.  Carefully pour 1 cup of hot water into each cup, and then put a thermometer in each cup. (If you only have one thermometer, you can do one cup at a time, but it will take a lot longer.)insulation handoutinsulation thermometer
  4. Cover each cup with plastic wrap, making sure you can still read the thermometer without removing the plastic wrap.
  5. Record the starting temperature for each cup.
  6. Leave the cups alone for ten minutes and then record the new temperatures. Wait ten more minutes, and then take one more temperature reading.
  7. Substract to figure out the difference between the starting temperature and the ending temperature for each cup. Record these numbers, and decide which one had the smallest difference. Was your hypothesis right?

insulation finishing handout
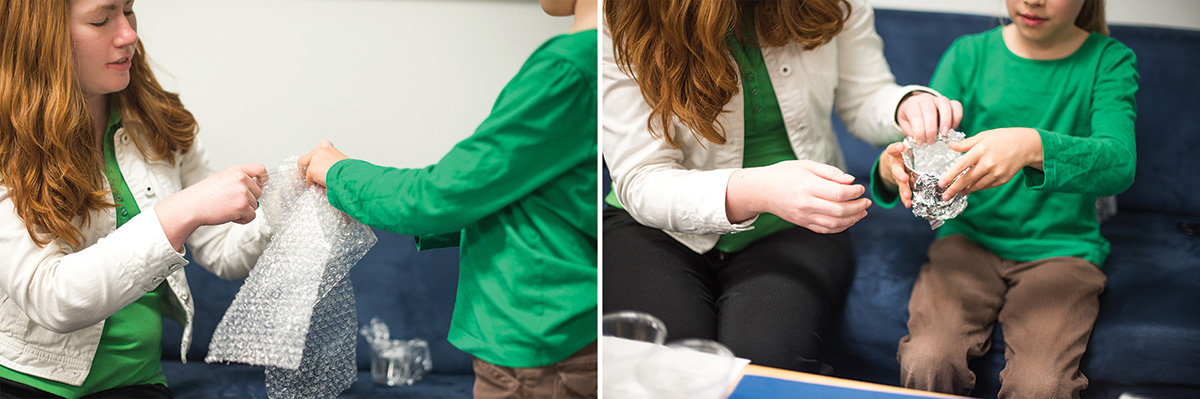
Taking It Further (Optional)

  1. List other materials that could be used as insulation. Predict how well each would work.
  2. Repeat the the experiment with ice water. Does this change your hypothesis? If so, which insulation is best for keeping ice water cold?

This experiment is a great way to introduce your child to STEM activities since engineers and designers frequently rely on the principles your child is learning to create better products and materials. If we were going to make a thermos to keep hot chocolate hot—or cold milk cold—what should we make it out of?

If you’d like to see how this activity could work on the high school level, check out the Build a Better Thermos activity and the accompanying teacher’s guide.

Filed Under: Successful Learning Tagged With: homeschool science, insulation, science activity, STEM

What Is STEM and How Do I Teach It?

October 19, 2017 by Justin


If you’re like me, you have a hard time keeping up with all the new buzzwords in education. When you hear about STEM, it’s usually being talked about as if it’s a subject all its own—one more thing you need to worry about teaching your kids. The reality is that you’re probably already teaching it, especially if you are using BJU Press textbooks for science and math. We were doing STEM long before it was called STEM.

What STEM Is

STEM is an acronym for

  • Science
  • Technology
  • Engineering
  • Math

Technically, any lesson that falls into one of these subject areas is a “STEM lesson.” But the term is typically used when describing activities that seek to teach kids how to apply those subjects to real-world applications. If hearing about STEM brings to mind pictures of kids building robots, that’s because robotics and programming are examples of real-world applications. They are definitely STEM, but STEM isn’t limited to electronics. Exercises can also include chemistry experiments, math equations used to design buildings or vehicles, weather analysis, and more.

Why It’s Hot

The acronym actually dates back to 1998 but has recently gained a lot of popularity. Experts in the United States determined that we were behind other countries in these areas in terms of test scores and the number of college graduates holding degrees in those fields. The majority of high-paying new jobs fall into the STEM category, and there aren’t enough graduates to meet that demand.

Why It Matters

Homeschoolers usually aren’t big on educational fads, focusing instead on time-tested approaches that we know work. The acronym STEM might be trendy but the idea isn’t new. The fundamental processes used in math and science never change, but the way we apply them to the real world has to because the demands of the job market change. If we’re going to bring up our children to be good stewards of God’s creation and to love their neighbors, we have to equip them with the tools they need to accomplish those things in a modern world. That’s why BJU Press has been including these real-world applications in our science and math textbook lines from the beginning.

What to Do

One of the best things about homeschooling is that you can do what’s right for your family. I believe STEM is very important, so here are two things I plan to do with my own son:

  • I’m going to make sure that the curriculum I’m using has plenty of up-to-date STEM exercises that will help him learn.
  • I’m going to personally come at the activities with a learner’s attitude. A lot of the lessons, especially ones involving technology and programing might be foreign to parents who aren’t actively involved in fields that use them, but I’m excited about learning along with my son and certainly won’t skip over lessons that may seem unfamiliar or difficult. We’ll get through them together.

Did you find this post helpful? Would you like to share a STEM activity that has worked in your homeschool? Be sure to comment below! Also, to get you started, here are six free STEM activities from BJU Press science textbooks.


Save

Save

Filed Under: Simplified Homeschool, Successful Learning Tagged With: activities, activity, math, science, STEM, technology

Teaching Work Skills: Spreadsheet Activity

September 21, 2017 by Justin


Entering data into a spreadsheet is one of the more mundane aspects of my job, but it’s also a critical part of what I do. I’m able to take lots of data about our company and use math to figure out how we can better serve homeschool families. That’s the part that excites me.

Spreadsheets are used in just about all academic and business environments. Learning how to use them at home can give your student a big advantage in college and in the workforce.

Here’s a basic and enjoyable activity from our Algebra 2 textbook to get your child started with spreadsheets and show how math concepts relate to everyday work.  The user interface can vary depending on which spreadsheet software you’re using, but just about any should work for this activity. Here are some popular options:

• Google Sheets™ – You can use this web-based spreadsheet program for free, but you have to have a Google account. It can be used on just about any platform.

• Microsoft Excel – This is perhaps the most robust and widely used spreadsheet program. It’s paid software that you install on your Windows, macOS, iOS, or Android device.

• LibreOffice® Calc – As open-source software, this can be downloaded for free and installed on just about any desktop operating system. The interface is a bit dated compared to the other two options.

Activity: Daily High Temperature

A scientist can use a spreadsheet to track a city’s daily high temperature and to determine the weekly average temperature in both Fahrenheit and Celsius. Make a spreadsheet to record a particular location’s high temperatures daily for several weeks and construct a graph illustrating the data. Weather Underground has a great weather history tool that you can use for this.

After entering the numbers for the first two weeks in column A, highlight the cells that establish a pattern (cells A3 and A4). Then use the fill handle (the small square in the lower right-hand corner of the highlighted area) to expand the box down the column to row 6.

Now record the data for each day. Also enter the following formulas to calculate the average high temperature for the week in Fahrenheit and convert this average to degrees Celsius.

In column I row 3 (cell I3), enter =(B3+C3+D3+E3+F3+G3+H3)/7 to find the average.

In column J row 3 (cell J3), enter =5/9*(I3-32) to convert to Celsius.

Most spreadsheets include a function (for adding a series of numbers and finding their average) that can be used to simplify the first formula to something like this: =(AVERAGE(B3:H3))

These formulas can be copied into the cells for the remaining weeks by dragging the fill handle down. Notice how the cell references in the formulas are adjusted relative to each cell’s position in the spreadsheet when the formula is replicated in this manner. Most spreadsheets also allow you to quickly generate graphs from the numerical data.

Once the activity is completed, have your student think about how math was at work behind the scenes. Ask questions like these:

  • What does the data show?
  • What did the formulas help you accomplish?
  • Was using the spreadsheet easier than doing the work manually?
  • Can you think of any other industries or tasks where a spreadsheet could be useful?

The goal of this activity is not to produce a nice graph at the end, but to gain an understanding of exactly how a spreadsheet works and how it can organize data and solve real-world problems using math.

If your student enjoys this activity, consider using one of the similar activities in Algebra 2 to improve your student’s spreadsheet skills.

Microsoft, Encarta, MSN, and Windows are either registered trademarks or trademarks of Microsoft Corporation in the United States and/or other countries.

Filed Under: Successful Learning Tagged With: algebra, excel, math, speadsheet, STEM

Primary Sidebar

As parents, teachers, or former homeschool students, we are passionate about homeschooling from a biblical worldview. We hope these teaching tips, fun activities, and inspirational stories support you in teaching your children.

Email Signup

Sign up for our homeschool newsletter and receive select blog posts, discounts, and more right to your inbox!

Connect with Us!

                    Instagram     

Read Posts on Specific Subjects

Early Learning
Foreign Language
History
Language Arts
Math
Science

Footer

Disclaimer

The BJU Press blog publishes content by different writers for the purpose of relating to our varied readers. Views and opinions expressed by these writers do not necessarily state or reflect the views of BJU Press or its affiliates. The fact that a link is listed on this blog does not represent or imply that BJU Press endorses its site or contents from the standpoint of ethics, philosophy, theology, or scientific hypotheses. Links are posted on the basis of the information and/or services that the sites offer. If you have comments, suggestions, questions, or find that one of the links no longer works, please contact us.

Pages

  • About BJU Press
  • Conversation Guidelines
  • Terms of Use & Copyright

Archives

© 2023 · BJU Press Homeschool