• Skip to primary navigation
  • Skip to main content
  • Skip to primary sidebar
  • Skip to footer

BJU Press Blog

  • Home
  • Shop
    • Shaping Worldview
  • Simplified Homeschool
  • Successful Learning

Christian school

Greenhouse Experiment Results

May 21, 2015 by BJU Press Writer

When Ginger Ericson needed an example of a controlled experiment for her upcoming seventh-grade Life Science Distance Learning course, my coworker Stephen and I decided to test internet claims that microwaved water causes death or deformation in plants.

Now the plant experiment is complete, and it was a lot of fun. In retrospect, I would love to redo it using the things our team learned. However, the process of learning continues, and there’s plenty of room for us to revisit this project, and perhaps some of you can try it at home.
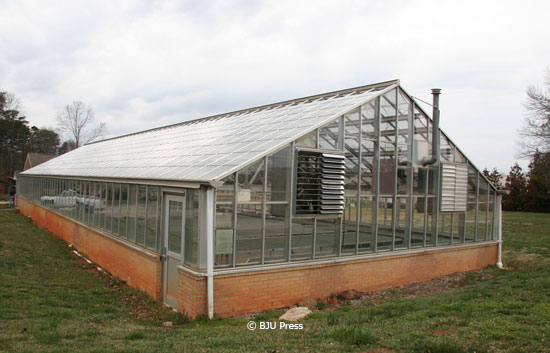
The Experiment

3 groups of 15 pots from the microwave water plant experiment

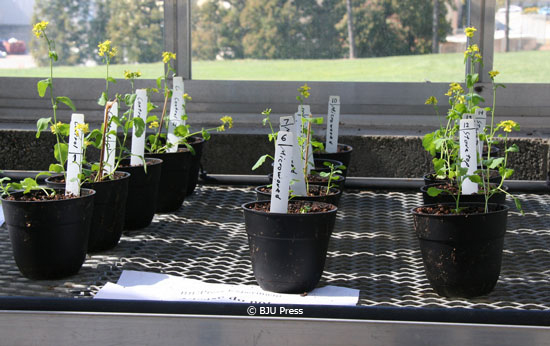
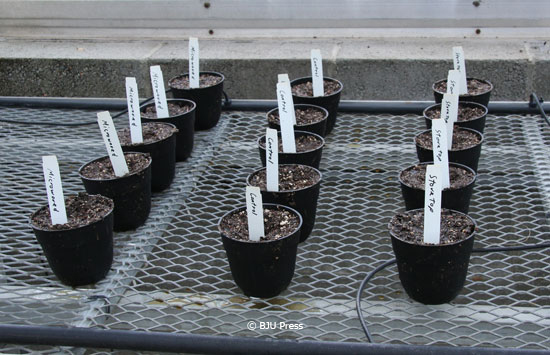
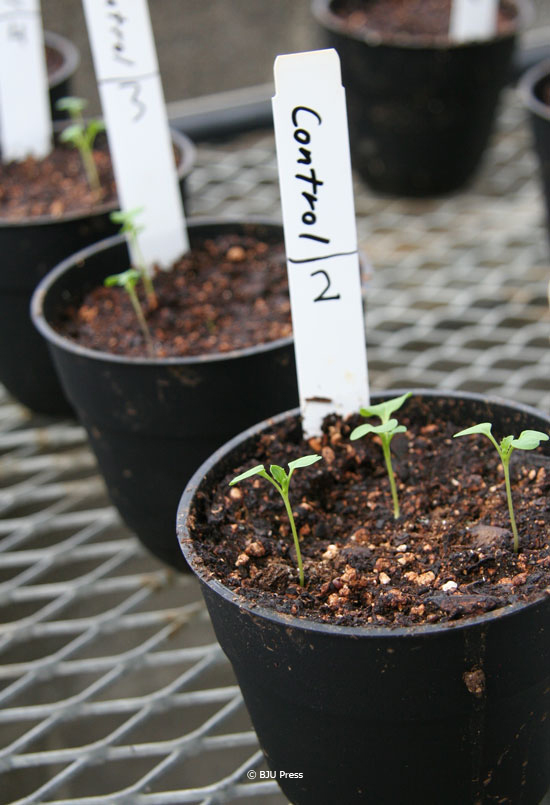
After the first signs of seed germination appeared, Krista and Ashley recorded our observations and measurements for four weeks. Our data outlined below involves twelve of the original fifteen pots.

When comparing plants, age is important, especially when dealing with plants that grow as rapidly as ours did. It really means very little to compare a plant that has been growing for six days to one that has been growing for only three days and then announce that the first plant is larger. The four Microwave Group pots germinated a few days later than the others, so the groups could not just be compared to each other on a given date. Instead, all the data presented shows the average height, leaf number, and flower number of each group by day after germination, which we defined as the first day a plant was recorded in the pot.

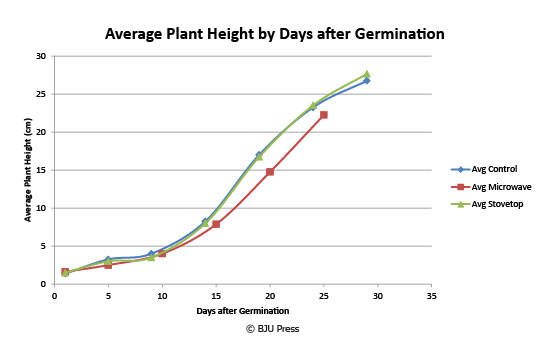
The average heights of the three groups were similar, but the Microwave Group plants were slightly behind the plants in the other groups.

chart of average plant height by days after germination for BJU Press plant experiment

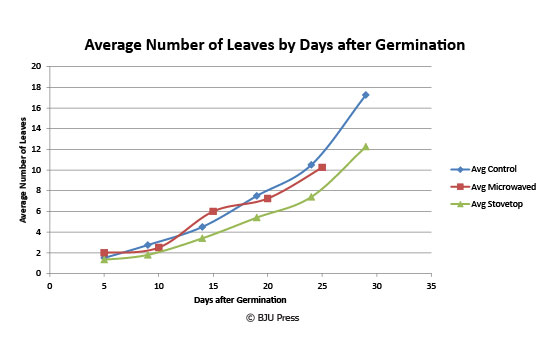
The average numbers of leaves in the three groups were also similar, with the Stovetop Group being slightly behind the other two.

chart data measuring average number of leaves by days after germination for BJU Press plant experiment

It’s difficult to measure the average number of flowers. We took our measurements two to three times each week, and it is very possible that some flowers may have bloomed, been pollinated, and then died between two measurements. However, the data indicates that the Microwave Group plants began to flower before the others, had fewer flowers, and began to taper off before the other two groups. The Stovetop Group plants had also begun to taper off by the end of the experiment but had as many flowers as the plants in the Control Group. The number of flowers in the Control Group seemed to still be increasing.

The Results

At the end of any project, lessons should be learned that can be applied to the future. This experiment was no exception. Although we were very pleased with how this turned out,  some factors that were not controlled may have affected our results. If you’d like to set up this experiment, we would recommend these adjustments:

  1. Filter the water or use distilled water. Microwaving is a very inefficient method of boiling water, so nearly a quart of every gallon is evaporated. We used spring water, so the evaporated water left a good bit of precipitated calcium carbonate. Since the water boiled on the hotplate lost relatively little to evaporation, this phenomenon occurred to a far less extent. It is possible the excess calcium carbonate might have caused the smaller size observed in the plants in the Microwave Group.
  2. Take measurements every day. We took measurements two or three times a week, and that worked well with plant height and leaf number, but it may have caused some of the unusual results for the flower number. The fact that we used a plant variety specifically bred to complete its lifecycle in less than six weeks may have exacerbated this issue.
  3. Thin the plants at the beginning of the experiment so that each pot has the same number of plants. Some of our pots had only one plant, and others had as many as three. The resulting difference in competition could significantly affect all four measurements used.

What can we conclude?

The plants in the Microwave Group didn’t all die, and they didn’t all evidence horrible deformities—two results suggested on some websites. The plant height is curious, but so is the smaller number of leaves in the Stovetop Group. In the end, the small sample size prevents us from making broad generalizations, but we can conclude that plants do not seem greatly affected by microwaved water.

Keep an eye out for this experiment in our upcoming seventh-grade Life Science Distance Learning course!

• • • • •

Elwood holds a BA in biology and an MA in English from Bob Jones University. After working with the video lesson department at BJU Press for five years, he now serves as a secondary-level science writer at BJU Press. When not working, he enjoys taking random college classes, reading, playing disc golf, and hanging out with his wife and three kids.

Filed Under: Successful Learning Tagged With: Christian school, distance learning, experiment, homeschool, microwaves, plants, science, water

A Tale of Microwaves and Greenhouses

April 30, 2015 by BJU Press Writer

Did you ever have one of those moments when you just wanted to test something for yourself? Many good ideas never progress beyond the thinking stage because of a lack of resources, but every once in a while, the opportunity to make that idea a reality presents itself. My coworker Stephen Garrison and I experienced this recently after discussing internet claims that microwaved water causes death or deformation in plants. During our discussion, we gradually realized that we didn’t have to just talk about it; this was something we could test ourselves.

Our conversation might never have been anything more than another one of those unfulfilled good ideas if biological sciences teacher Ginger Ericson hadn’t needed an example of a controlled experiment for her upcoming seventh-grade Life Science course. Our idea seemed perfect because it would be a fairly simple experiment and because it would test a question that buzzes around the internet.

At the beginning, the biggest obstacle to our plan was finding a location to carry out our experiment. This time of year, temperatures can vary wildly in Greenville. Furthermore, the effects of the different water treatments, if any, would be diminished if the plants were exposed to rain. So we needed a controlled environment, one that filtered out factors such as rain and temperature fluctuations.

We were able to gain access to a fully climatized glass-metal greenhouse. This type of greenhouse is completely enclosed, so no rain can get to the plants inside, and the internal temperature can be kept constant.

Our setup was fairly simple.

  1. We filled fifteen four-inch pots with wet potting soil.

shoveling dirt into a pot for plants

  1. We planted three or four Brassica rapa (turnip) seeds in each pot.

turnip seeds in the palm of a person's hand

  1. Three groups received a random group of five pots:
    • a control group
    • a group to be treated with water previously boiled for five minutes on a hotplate
    • a group to be treated with water previously boiled for five minutes in a microwave

five pots of three groups for a science plant experiment

  1. We placed the pots in the greenhouse and allowed the seeds to germinate.

greenhouse used for BJU Press Science 7 plant experiment

  1. Now that the plants have germinated, we continue watering each group with the corresponding water treatment and recording measurements for
    • plant height,
    • number of leaves, and
    • number of flowers.

control group plant

These data should give us an indication of what effect, if any, the different types of water have on the plants. Check back with us to find out the results of this good idea turned into reality.

• • • • •

Elwood holds a BA in biology and an MA in English from Bob Jones University. After working with the video lesson department at BJU Press for five years, he now serves as a secondary-level science writer at BJU Press. When not working, he enjoys taking random college classes, reading, playing disc golf, and hanging out with his wife and three kids.

Filed Under: Successful Learning Tagged With: Christian school, distance learning, experiment, homeschool, science, water

External Compliance vs. Heart-Engaged Obedience?

October 23, 2014 by Cosette

Christian education is facing a crucial and unsettling time. It has sought for years to lay a thoroughly biblical foundation for students and to impart truth on every hand. But many Christian school students are cold, and even resentful, toward that teaching. As Christian educators, we should try to bring students back to Christianity’s foundation—the truth of the gospel—so that when we address students’ behavior it is motivated by and grows out of our dedication to the gospel.

Since young people sometimes try to define truth by their own subjective perceptions, perhaps we should ask ourselves some questions about what we are teaching them. Are we teaching them the whole truth? Could we actually be dumbing down our presentation of the truth? Amid calls of “Don’t give them doctrine, make it practical!” and an obsession with “principles to live by,” have we maybe lost sight of the basics and unintentionally obscured the person of the gospel, Jesus Christ?

We often respond with more and more behavior-focused instruction when our students’ behavior seems to indicate that they do not understand Christianity. There’s a need to balance our teaching of practical do’s and don’ts with teaching Christ’s perfect sacrifice for us on the cross. Perhaps one reason the gospel has lost its wonder and richness for young people is because of our presentation of the wonderful central figure—Jesus Christ. He is sometimes overshadowed by lesser goals when He should be the focus as well as the motivator behind practical Christian living.

In 1 Corinthians 1:23 Paul also states that there were those (the Jews and Greeks) who found his preaching of Christ unacceptable. Even though the impact of Paul’s ministry on both his own generation and on every generation since is astounding, even Paul’s faithful preaching of the gospel was not welcomed by every person who heard it. The same holds true when we admonish our students. Some will accept it while others may reject the truth.

When faced with such animosity or dismissal of the truth, we may mourn our own lack of power and the great limitations of our flesh that we think make us inadequate to share the gospel that we love. We must remember that God is never frustrated or limited. His promise in Isaiah 55:11 shows that His Word is never “void.” He holds the key to our hearts and has the power to accomplish whatever He intends to—in spite of our sinful nature and wandering hearts.

God alone is able to reach our hearts and those of our students. Whatever work He intends to do in our students’ lives is not impossible. And we can help by trusting in His power, not our own, to guide us as we share His truth through our words and actions.

How do you share the Truth with your students?

Filed Under: Shaping Worldview Tagged With: Bible, Christ, Christian school, truth

P Is for Party!

October 9, 2014 by Megan

Preschool and K4 students work their way through the alphabet letter by letter. They need to learn to recognize letters by their shapes, and they need to know what sounds the letter makes. These are important pre-reading skills that will help them when they get to K5 and beyond.

Learning the alphabet doesn’t have to be boring. Since young children learn best by experiencing the world around them, parents and teachers can make learning fun by involving all of the senses.

October is both National Pizza Month (according to pizza.com) and National Popcorn Poppin’ Month (according to popcorn.org). Put these two ideas together for a fantastic p-themed party that will help teach little ones about the letter p.

Dress

Encourage the kids to dress up as something that begins with the letter p. Examples include a pirate, parrot, princess, painter, pumpkin, policeman, popsicle, or postal worker. Or you could let them wear their pajamas to school!

Food

Every party has to have food. For this p-themed party, pizza and popcorn are on the menu. Below are some great easy recipes for treats you can prepare ahead of time.


caramel popcorn in a treat bag and bowl

Caramel Popcorn

Ingredients

4 quarts popped popcorn (unsalted, butter-free)

1 cup brown sugar

½ cup light Karo® syrup

1 stick margarine

½ tsp. salt

½ tsp. baking soda

1 tsp. vanilla extract

Directions
        1. Preheat oven to 250 degrees. Line a shallow roasting pan with foil and coat it with cooking spray. Add popped popcorn.
        2. Combine the margarine, salt, brown sugar, and Karo® syrup in a medium saucepan. Stir constantly over medium heat until the mixture comes to a rolling boil.
        3. Boil for five minutes without stirring. Remove from heat, and quickly add the baking soda and vanilla; stir until the mixture turns an even caramel color.
        4. Pour mixture over popped popcorn and toss to coat evenly.
        5. Bake for one hour, tossing every fifteen minutes. Allow to cool; store in an airtight container.

Veggie Pizza

Ingredients

2 packages refrigerated crescent rolls

1 cup sour cream

1 8-oz. package cream cheese

1 package dry ranch dressing mix

1 small onion, chopped

1 stalk celery, chopped

1 red bell pepper, chopped

1½ cups broccoli, chopped

1 carrot, grated

Directions
            1. Preheat oven to 350 degrees.
            2. Pat crescent roll dough onto a greased jellyroll pan. Pierce with a fork.
            3. Bake for ten minutes. Cool completely.
            4. In a medium bowl, combine sour cream, cream cheese, and ranch dressing mix. Spread onto crust.
            5. Add chopped vegetables. Cover with plastic wrap and chill for an hour or more in the fridge. Cut into small triangles and serve.

Games/Activities

Don’t forget about your kinesthetic learners. Below are some p-themed activities to get the kids moving.

Parade

The day before the party, ask the children to bring an object to school that starts with the letter p. Sample objects might include a stuffed puppy, a small pumpkin, a pencil, or a puppet. On party day, let each child carry his object as you all line up and walk around the school building. Be sure to smile and wave at the people you pass!

Musical Pillows

The day before the party, ask the children to bring a pillow to school. Play the classic game of musical chairs, but use pillows instead!

Peanut Toss

Materials

Bag of circus peanuts
Two buckets or other open containers
Masking tape

Directions
                1. Divide the children into two teams.
                2. Use the masking tape to mark two starting lines on the floor. Place the buckets two to three feet away from the tape marks.
                3. Challenge the children to try to toss the circus peanuts into the bucket. The team that gets more circus peanuts in the bucket wins.

As you can imagine, the possibilities for a p-themed party are endless! If you have a  p-themed party idea, please tell us about it in the comments.

Filed Under: Successful Learning Tagged With: alphabet, Christian school, early learning, games, homeschool, letter P, party, preschool, recipe

Bug Masks

October 3, 2014 by Megan


Little kids have big imaginations. Empty boxes can become caves, minivans, even rocket ships. Dressing up adds to the adventure. A plain bathrobe can transform them into superheroes. Add a pair of fur-lined boots, and suddenly they’re trekking through a frozen wilderness in search of polar bears.

This month, kids can create their own bug masks with some help from our free templates. Download the template to make a bee mask, a cricket mask, or a ladybug mask. Or make all three! Just follow the instructions below to get kids started on their own bug adventure.

Supplies to gather

  • printouts
    Bee mask | Cricket mask | Ladybug mask
  • clear tape
  • scissors
  • hole punch
  • yarn
  • crayons/markers/colored pencils
  • glitter (optional)
  • glue (optional)

Steps to follow

  1. Print out the mask template.
  2. Cut out the gray areas of the printout.
  3. Use a hole punch where indicated.
  4. Color and decorate the mask.
  5. Allow it to dry completely, if needed.
  6. Tie a piece of yarn to each hole to make a headband.
  7. Tie the mask around the child’s forehead, and let the fun begin!

What other fun crafts do you and your children enjoy doing? Let me know how your bug mask turned out by commenting below.

Filed Under: Successful Learning Tagged With: bugs, Christian school, crafts, homeschool, masks, science

  • Page 1
  • Page 2
  • Page 3
  • Page 4
  • Go to Next Page »

Primary Sidebar

As parents, teachers, or former homeschool students, we are passionate about homeschooling from a biblical worldview. We hope these teaching tips, fun activities, and inspirational stories support you in teaching your children.

Email Signup

Sign up for our homeschool newsletter and receive select blog posts, discounts, and more right to your inbox!

Connect with Us!

                    Instagram     

Read Posts on Specific Subjects

Early Learning
Foreign Language
History
Language Arts
Math
Science

Footer

Disclaimer

The BJU Press blog publishes content by different writers for the purpose of relating to our varied readers. Views and opinions expressed by these writers do not necessarily state or reflect the views of BJU Press or its affiliates. The fact that a link is listed on this blog does not represent or imply that BJU Press endorses its site or contents from the standpoint of ethics, philosophy, theology, or scientific hypotheses. Links are posted on the basis of the information and/or services that the sites offer. If you have comments, suggestions, questions, or find that one of the links no longer works, please contact us.

Pages

  • About BJU Press
  • Conversation Guidelines
  • Terms of Use & Copyright

Archives

© 2026 · BJU Press Homeschool