• Skip to primary navigation
  • Skip to main content
  • Skip to primary sidebar
  • Skip to footer

BJU Press Blog

  • Home
  • Shop
    • Shaping Worldview
  • Simplified Homeschool
  • Successful Learning

experiment

Getting Excited About Logos Science Kits

July 20, 2017 by Guest Writer

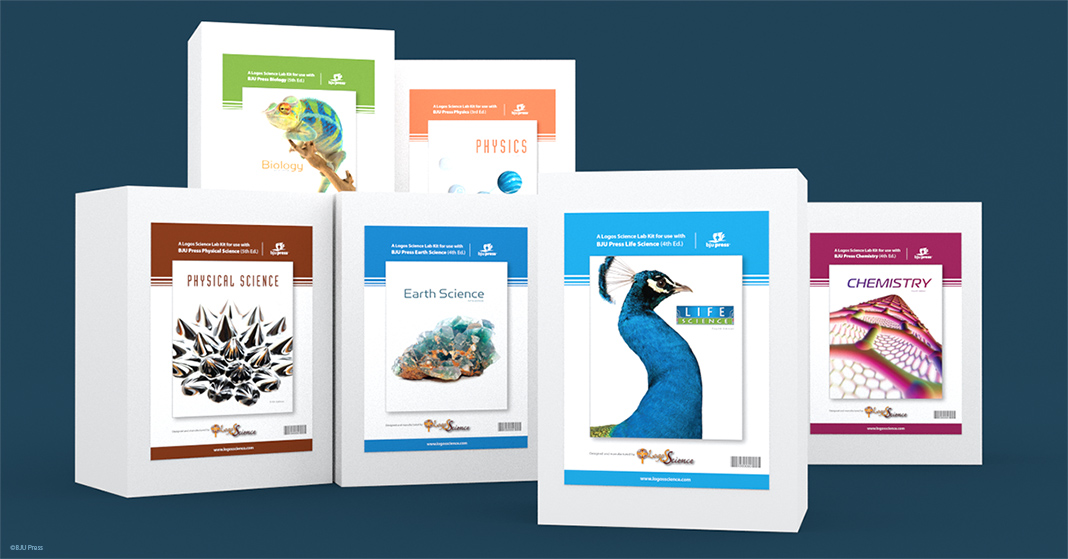
Have you discovered the Logos Science Kits yet? These kits were designed specifically for BJU Press secondary-level science courses, and they’re packed with tools, supplies, equipment, and clear instructions to help young homeschool scientists succeed!

Mr. Bill Harmon, a Distance Learning teacher, uses the Logos Science kits during his instruction sessions. As a chemist and a teacher of junior and senior high science and math courses, he appreciates the ingenuity of the Logos Science labs. The instructions are well-written, and the authors came up with creative ways to accomplish the labs in a homeschool setting.

Step-by-Step Guidance 

In using the labs for chemistry, Mr. Harmon adopted a “cooking show” style of presentation, revealing each step of the procedure and showing students a sample of the results they should see. “I leave the conclusion questions up to the student,” he explains. “That part is theirs to complete, along with noting any temperature variations of the experiment.”

For almost every lab, students can do all the setup and experimentation on their own, without an extra pair of hands. Thanks to the ten- to twelve-minute videos, students have a guide to help them succeed as they manipulate the materials and use the equipment.

Location, Location

Mr. Harmon recommends storing the materials and supplies for the labs in a dry, climate-controlled space so they will not degrade due to heat or cold. When homeschool students perform the lab, he suggests a location like the kitchen or perhaps a bathroom with ample counter space.

Correlation Between the Student Lab Manual and the Kit

According to Mr. Harmon, the student lab manual and the Logos Science Kits work well together. “The kit functions as an addendum to the student lab manual,” he says. “There are about three dozen labs included in each of the Logos kits. I use about thirty of them for the Distance Learning Chemistry course.”

Once in a while, the experiments suggested in the student lab manual and those included in the Logos Science Kit are different. For example, the lab in the student lab manual might be a specific experiment on titration, whereas the Logos kit may have a different experiment on titration. “They’re both teaching the same concept, though,” Mr. Harmon explains. “The kit often does labs on a micro scale. This benefits the homeschool student and prepares him or her for college science labs.”

Amazing Experiments

What’s Mr. Harmon’s favorite lab? While all of them are fascinating, he enjoys the titration lab the most. “When the material goes from clear to pink then disappears, it’s because the atoms that we can’t see are changing color based on their chemical structure,” he says. “It’s cool!”

Contents of the Kit

Logos Science Kits are available for purchase separately from the  other secondary science course materials. When you order your kit, check out the PDF link under the product description to find a list of all the equipment and supplies included . For example, the kit for chemistry makes your life much easier by including science supplies such as pH paper, O2 test tablets, test tubes, a molecular model kit, and dozens of other items and materials.

Each Logos Science Kit has enough materials for four students, which works well for homeschool co-ops, for passing on the kit to younger siblings, or for resale. If you have a young chemistry lover or physics fan in your homeschool, you’ll want to invest in this fantastic supplementary resource to encourage that affinity for science.

• • • • •

Rebecca is a work-at-home freelance writer, novelist, wife, and the mom of two bright-eyed little ones. She credits her success in writing and her love of books to her own mom, who homeschooled three kids from pre-K through high school.

Filed Under: Successful Learning Tagged With: chemistry, distance learning, experiment, homeschool, homeschool scientists, science, science labs

Turn your science student into a student scientist (lab)

December 8, 2016 by Justin

Picture of experiment lab tools

Like most subjects (including reading, spelling, and math) science is a subject that is best learned by actually practicing it. For Science this is through labs where children can experiment. Being able to memorize and recite encyclopedic knowledge isn’t enough because it doesn’t build true understanding. For that, you need to turn your student into a scientist who knows how to use the scientific process as a road map that leads to making discoveries on his own.

You might be wondering how to guide your children through re-creating a nuclear reaction at home. Of course, that’s not the best approach for a number of reasons—the least of which is that it would get you in trouble with the International Atomic Energy Agency (IAEA). Your child doesn’t have to reenact every major scientific experiment ever conducted to learn how to use and apply science. The secret is mastering science process skills. Exercises and experiments should be geared toward not only understanding certain concepts but also learning the scientific process.

What does a student scientist lesson look like?

Chapter 4 of the BJU Press Science 5 Student Text is hot! It’s all about heat and energy. The chapter starts out by introducing some concepts such as conduction, convection, and radiation. It then goes on to explain how insulation works. Next, it presents the following fun, easy-to-do experiment that is designed to build science process skills:

Lab: Keeping Warm

What you’ll need

  • 5 plastic cups
  • cotton batting
  • rubber bands
  • craft foam
  • bubble wrap
  • aluminum foil
  • hot water
  • thermometer
  • plastic wrap

Problem

Which kind of insulation will keep hot water warm the best?

04-01-a-cup

Experiment Procedure

  1. Wrap cotton batting around one of the cups. Be sure to cover the bottom and the sides of the cup. Use a rubber band to keep the batting in place.
  2. Prepare three more cups: one wrapped with craft foam, one with bubble wrap, and one with a double thickness of aluminum foil. Use rubber bands to secure each material. Do not wrap anything around the fifth cup.
  3. Predict which cup will best keep the hot water warm. Write down your hypothesis.
  4. Fill the cups with hot water and put a thermometer in each.
  5. Cover the top of each cup with plastic wrap, leaving the top of the thermometer sticking out.
  6. Measure and record the starting temperature for each cup.
  7. Leave the cups undisturbed for five minutes. Then measure and record the water temperature in each cup. Measure and record the temperatures again after another five minutes.
  8. Calculate the difference between the starting and ending temperatures for each cup.

Conclusions

  • Did your results support your hypothesis?
  • Which cup had the greatest change in temperature? Why?
  • Which type of insulated cup would you choose to hold hot chocolate? Why?

Follow-up

  • Use ice cubes instead of hot water to determine which insulation is best for keeping ice cubes from melting.

Labs like this one help build the skills that can turn your science student into a student scientist. Check out this lab and many other great skill-building ones in BJU Press Science 5.

Save

Filed Under: Successful Learning Tagged With: energy, experiment, heat, lab, science

Greenhouse Experiment Results

May 21, 2015 by BJU Press Writer

When Ginger Ericson needed an example of a controlled experiment for her upcoming seventh-grade Life Science Distance Learning course, my coworker Stephen and I decided to test internet claims that microwaved water causes death or deformation in plants.

Now the plant experiment is complete, and it was a lot of fun. In retrospect, I would love to redo it using the things our team learned. However, the process of learning continues, and there’s plenty of room for us to revisit this project, and perhaps some of you can try it at home.

The Experiment

3 groups of 15 pots from the microwave water plant experiment

After the first signs of seed germination appeared, Krista and Ashley recorded our observations and measurements for four weeks. Our data outlined below involves twelve of the original fifteen pots.

When comparing plants, age is important, especially when dealing with plants that grow as rapidly as ours did. It really means very little to compare a plant that has been growing for six days to one that has been growing for only three days and then announce that the first plant is larger. The four Microwave Group pots germinated a few days later than the others, so the groups could not just be compared to each other on a given date. Instead, all the data presented shows the average height, leaf number, and flower number of each group by day after germination, which we defined as the first day a plant was recorded in the pot.

The average heights of the three groups were similar, but the Microwave Group plants were slightly behind the plants in the other groups.

chart of average plant height by days after germination for BJU Press plant experiment

The average numbers of leaves in the three groups were also similar, with the Stovetop Group being slightly behind the other two.

chart data measuring average number of leaves by days after germination for BJU Press plant experiment

It’s difficult to measure the average number of flowers. We took our measurements two to three times each week, and it is very possible that some flowers may have bloomed, been pollinated, and then died between two measurements. However, the data indicates that the Microwave Group plants began to flower before the others, had fewer flowers, and began to taper off before the other two groups. The Stovetop Group plants had also begun to taper off by the end of the experiment but had as many flowers as the plants in the Control Group. The number of flowers in the Control Group seemed to still be increasing.

The Results

At the end of any project, lessons should be learned that can be applied to the future. This experiment was no exception. Although we were very pleased with how this turned out,  some factors that were not controlled may have affected our results. If you’d like to set up this experiment, we would recommend these adjustments:

  1. Filter the water or use distilled water. Microwaving is a very inefficient method of boiling water, so nearly a quart of every gallon is evaporated. We used spring water, so the evaporated water left a good bit of precipitated calcium carbonate. Since the water boiled on the hotplate lost relatively little to evaporation, this phenomenon occurred to a far less extent. It is possible the excess calcium carbonate might have caused the smaller size observed in the plants in the Microwave Group.
  2. Take measurements every day. We took measurements two or three times a week, and that worked well with plant height and leaf number, but it may have caused some of the unusual results for the flower number. The fact that we used a plant variety specifically bred to complete its lifecycle in less than six weeks may have exacerbated this issue.
  3. Thin the plants at the beginning of the experiment so that each pot has the same number of plants. Some of our pots had only one plant, and others had as many as three. The resulting difference in competition could significantly affect all four measurements used.

What can we conclude?

The plants in the Microwave Group didn’t all die, and they didn’t all evidence horrible deformities—two results suggested on some websites. The plant height is curious, but so is the smaller number of leaves in the Stovetop Group. In the end, the small sample size prevents us from making broad generalizations, but we can conclude that plants do not seem greatly affected by microwaved water.

Keep an eye out for this experiment in our upcoming seventh-grade Life Science Distance Learning course!

• • • • •

Elwood holds a BA in biology and an MA in English from Bob Jones University. After working with the video lesson department at BJU Press for five years, he now serves as a secondary-level science writer at BJU Press. When not working, he enjoys taking random college classes, reading, playing disc golf, and hanging out with his wife and three kids.

Filed Under: Successful Learning Tagged With: Christian school, distance learning, experiment, homeschool, microwaves, plants, science, water

A Tale of Microwaves and Greenhouses

April 30, 2015 by BJU Press Writer

Did you ever have one of those moments when you just wanted to test something for yourself? Many good ideas never progress beyond the thinking stage because of a lack of resources, but every once in a while, the opportunity to make that idea a reality presents itself. My coworker Stephen Garrison and I experienced this recently after discussing internet claims that microwaved water causes death or deformation in plants. During our discussion, we gradually realized that we didn’t have to just talk about it; this was something we could test ourselves.

Our conversation might have never have been anything more than another one of those unfulfilled good ideas if biological sciences teacher Ginger Ericson hadn’t needed an example of a controlled experiment for her upcoming seventh-grade Life Science Distance Learning course. Our idea seemed perfect because it would be a fairly simple experiment and because it would test a question that buzzes around the internet.

At the beginning, the biggest obstacle to our plan was finding a location to carry out our experiment. This time of year, temperatures can vary wildly in Greenville. Furthermore, the effects of the different water treatments, if any, would be diminished if the plants were exposed to rain. So we needed a controlled environment, one that filtered out factors such as rain and temperature fluctuations.

We were able to gain access to a fully climatized glass-metal greenhouse. This type of greenhouse is completely enclosed, so no rain can get to the plants inside, and the internal temperature can be kept constant.

Our setup was fairly simple.

  1. We filled fifteen four-inch pots with wet potting soil.

shoveling dirt into a pot for plants

  1. We planted three or four Brassica rapa (turnip) seeds in each pot.

turnip seeds in the palm of a person's hand

  1. Three groups received a random group of five pots:
    • a control group
    • a group to be treated with water previously boiled for five minutes on a hotplate
    • a group to be treated with water previously boiled for five minutes in a microwave

five pots of three groups for a science plant experiment

  1. We placed the pots in the greenhouse and allowed the seeds to germinate.

greenhouse used for BJU Press Science 7 plant experiment

  1. Now that the plants have germinated, we continue watering each group with the corresponding water treatment and recording measurements for
    • plant height,
    • number of leaves, and
    • number of flowers.

control group plant

These data should give us an indication of what effect, if any, the different types of water have on the plants. Check back with us in May to find out the results of this good idea turned into reality.

• • • • •

Elwood holds a BA in biology and an MA in English from Bob Jones University. After working with the video lesson department at BJU Press for five years, he now serves as a secondary-level science writer at BJU Press. When not working, he enjoys taking random college classes, reading, playing disc golf, and hanging out with his wife and three kids.

Filed Under: Successful Learning Tagged With: Christian school, distance learning, experiment, homeschool, science, water

Primary Sidebar

As parents, teachers, or former homeschool students, we are passionate about homeschooling from a biblical worldview. We hope these teaching tips, fun activities, and inspirational stories support you in teaching your children.

Email Signup

Sign up for our homeschool newsletter and receive select blog posts, discounts, and more right to your inbox!

Connect with Us!

                    Instagram     

Read Posts on Specific Subjects

Early Learning
Foreign Language
History
Language Arts
Math
Science

Footer

Disclaimer

The BJU Press blog publishes content by different writers for the purpose of relating to our varied readers. Views and opinions expressed by these writers do not necessarily state or reflect the views of BJU Press or its affiliates. The fact that a link is listed on this blog does not represent or imply that BJU Press endorses its site or contents from the standpoint of ethics, philosophy, theology, or scientific hypotheses. Links are posted on the basis of the information and/or services that the sites offer. If you have comments, suggestions, questions, or find that one of the links no longer works, please contact us.

Pages

  • About BJU Press
  • Conversation Guidelines
  • Terms of Use & Copyright

Archives

© 2023 · BJU Press Homeschool