• Skip to primary navigation
  • Skip to main content
  • Skip to primary sidebar
  • Skip to footer

BJU Press Blog

  • Home
  • Shop
    • Shaping Worldview
  • Simplified Homeschool
  • Successful Learning

science

Homeschool Outside with These Ideas (Printable)

April 18, 2017 by Megan

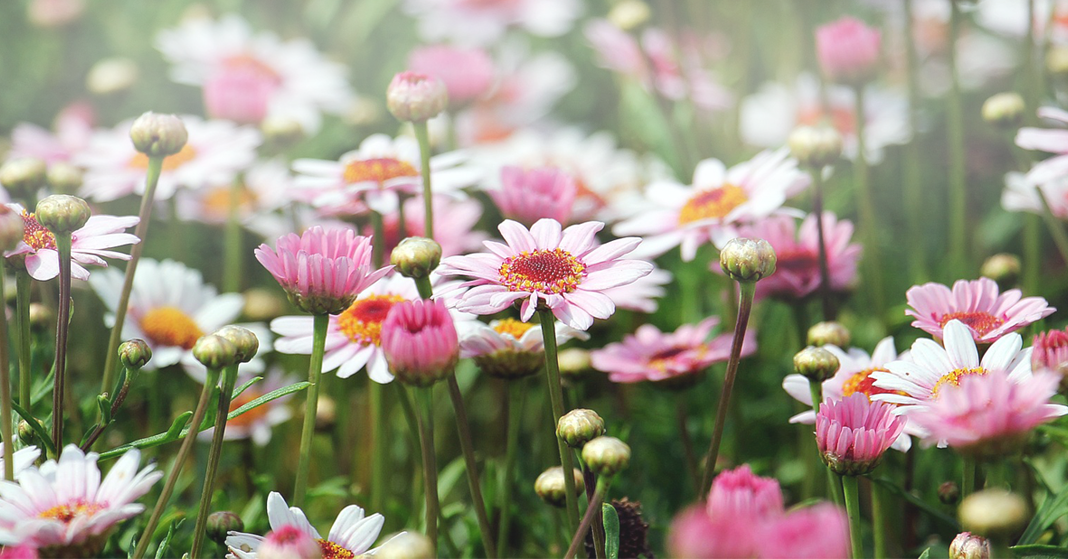
Lately, my homeschool has been plagued by spring fever. Warm air, bright sunshine, blooming trees and flowers, playful squirrels, and visiting birds have all conspired together to distract my children. And I can hardly blame them for being distracted. There are days when I, too, would much rather be outside soaking up the sun than inside teaching a math lesson.

One of the great things about homeschooling is that it can happen anywhere. We don’t have to do our lessons in our homeschool room. We can do them outside while sitting on the porch or on a picnic table at the park. In fact, we don’t even have to sit anywhere. We can learn a lot by just walking through our neighborhood and observing the world around us.  Download our walking activity sheets and use some of the ideas below (or come up with some of your own) to keep the learning going while you enjoy some fresh air and exercise.

1. Gather Math Manipulatives

Who said that you have to use paper to do addition and subtraction? Take a walk and gather twigs, small rocks, pinecones (or whatever else interests your child), and use those as your manipulatives for the day if possible.

2. Review Math Concepts

Are you learning about geometry? See if your child can identify some solid figures. Are you learning about measurement? Measure the distance in feet, yards, or even steps between two trees in your yard. Or measure the distance between your front door and the mailbox. Need to work on statistics? Grab a stopwatch and time how long it takes for each family member to walk around the block. Then figure out the average walking time. Your neighborhood is a great place to practice real-world math.

3. Identify Nouns or Verbs

After you finish walking, encourage your children to write down twenty nouns or verbs that they observed during your walk. Nothing can be on the list more than once.

4. Write a Description

What interesting things are going on in your neighborhood? Is someone building a house? Are there baby ducks in a nearby pond? Snap a picture if you can and have your child write a descriptive paragraph about it using the writing sheet in the activity packet.

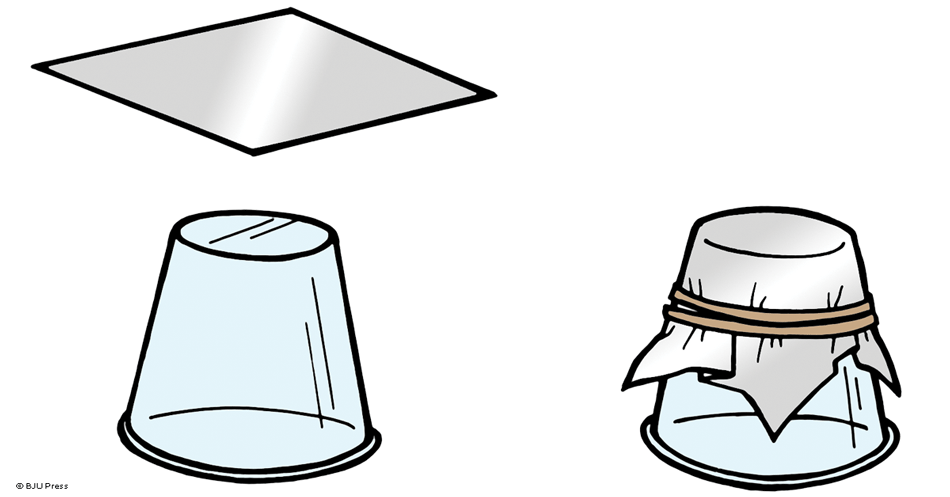
5. Review Science Concepts

This week in Science 2, my daughter is learning about forces, so we’re going to take a ten-minute walk and list all the push-or-pull movements that we observe.  You could do something similar with other science concepts. Can your children find an example of a solid, liquid, and a gas? Can they list a dozen natural resources that they observed?

As homeschoolers, we know that learning is not confined to a specfic time or even to a designated space. So take advantage of the beautiful spring weather and move your learning outside. Everyone will be glad you did!

Filed Under: Simplified Homeschool Tagged With: language arts, learning outside, math, science, walking activity

Our Distance Learning Teachers Have Quite the Character

March 30, 2017 by Meredith

There wouldn’t be Distance Learning daily video lessons without our teachers. They’re the ones who generate the excitement, script the lessons, and bravely face the camera on recording days. How would you like to do all that? I didn’t think so—me either.

Sometimes because of all the seriousness of recording lessons, you only get to experience one side of these teachers’ multi-faceted personalities. So without further ado, let’s view a “different” side of three of our Distance Learning teachers.

Miss Jessica Ingersoll

As an elementary Distance Learning teacher, Miss Ingersoll enjoys many things, and near the top of the list is being your child’s teacher. Watch “Meet Our New Teacher” for some fun facts about Miss Ingersoll. See what similarities your child can relate to. You can view a sample daily video lesson for her courses at the links below.

  • Heritage Studies 3
  • Heritage Studies 5
  • Science 5

Mr. Bill Harmon

As a secondary Distance Learning teacher, Mr. Harmon tackles the subjects your child (and you) might find difficult. His unique approach creates memories your family will never forget. Watch “Experiencing Chemistry with Dry Ice” for a sample of how he conducts scientific experiments on camera. And yes, in case you’re wondering, he’s this crazy off camera too! Take a look for yourself by viewing a sample daily video lesson for each of his courses at the links below.

  • Science 6
  • Fundamentals of Math (Grade 7)
  • Pre-Algebra (Grade 8)
  • Algebra 1 (Grade 9)
  • Physical Science (Grade 9)
  • Chemistry (Grade 11)

Mrs. Debbie Overly & Distance Learning Families

Elementary Distance Learning teacher Mrs. Overly shares a funny anecdote about an early filming experience in “Homeschool Families Share About Distance Learning,” an interview style video from a homeschool convention. You’ll also hear from other homeschool parents and students about their experience with Distance Learning video lessons. Mrs. Overly is well known and loved by her students. She includes many demonstrations and hands-on activities in her daily video lessons to help your child learn. View a sample daily video lesson from each of her courses at the links below.

  • Math 3
  • English 4
  • Handwriting 4
  • Science 4
  • Handwriting 5
  • English 6

Your family has the opportunity to meet several different Distance Learning teachers and attend their workshop sessions at homeschool conventions this year. Follow our BJU Press Homeschool Facebook page for announcements about where the teachers will be.

Filed Under: Simplified Homeschool Tagged With: distance learning, DLO, English, history, math, science, teachers, video lessons

Inspiring Women in Science

March 14, 2017 by BJU Press Writer

Behind every woman in science, there is often another woman.

History is full of women in science who we may not have noticed before. Rosalind Franklin was an emerging chemist at the University of Cambridge when she met Adrienne Weill. Adrienne, a chemist herself and a French refugee, was a former student of physicist/chemist Marie Curie. Marie Curie was the first woman to win a Nobel Prize. Adrienne tutored Rosalind in French and eventually helped her get a job with the French government doing x-ray crystallography. X-ray crystallography involves using x-rays from atomic crystals to make images of the shapes of molecules.

At the same time (in the early 1950s), James Watson and Francis Crick were working on building a model of the DNA molecule that contains the code of life in the cell. They were having a hard time determining the shape of DNA. Rosalind’s work in x-ray crystallography on the DNA molecule convinced Watson and Crick that DNA was a double helix. Rosalind’s experience in chemistry opened up doors of understanding in biology for generations to come.

inspiring women in science

As a woman involved in science myself, I have a BS in chemistry and a MS in teaching and learning. It was my mom, who studied biology and chemistry, who inspired me to study science. However, I’ve largely stayed away from biology, working for the past thirteen years at BJU Press on textbooks for physics, earth science, physical science, and chemistry. But that changed two years ago when I started collaborating with several other people to write Biology (fifth edition).

While working on the first chapter, I realized that the story of Rosalind Franklin’s contribution aptly illustrates the way science works in the real world and how women can be a part of that. My hope is that our work on Biology (fifth edition) will inspire both young women and young men alike to investigate God’s world and use their knowledge to help people for generations to come.

If you’re interested in learning more about Biology (fifth edition), I’ll introduce the book to you in this video.

• • • • •

Rachel is passionate about helping students engage, learn, create, and experience the joy of learning. And she wants this enthusiasm to be contagious. The same sense of wonder that sparked her curiosity in childhood spurred her to pursue a degree in chemistry and a master’s degree in education. She wants to share her passion as she draws from her teaching and writing experience to provide academic oversight for writing teams at BJU Press.

Filed Under: Successful Learning Tagged With: biology, science, women in science

Turn your science student into a student scientist (lab)

December 8, 2016 by Justin

Picture of experiment lab tools

Like most subjects (including reading, spelling, and math) science is a subject that is best learned by actually practicing it. For Science this is through labs where children can experiment. Being able to memorize and recite encyclopedic knowledge isn’t enough because it doesn’t build true understanding. For that, you need to turn your student into a scientist who knows how to use the scientific process as a road map that leads to making discoveries on his own.

You might be wondering how to guide your children through re-creating a nuclear reaction at home. Of course, that’s not the best approach for a number of reasons—the least of which is that it would get you in trouble with the International Atomic Energy Agency (IAEA). Your child doesn’t have to reenact every major scientific experiment ever conducted to learn how to use and apply science. The secret is mastering science process skills. Exercises and experiments should be geared toward not only understanding certain concepts but also learning the scientific process.

What does a student scientist lesson look like?

Chapter 4 of the BJU Press Science 5 Student Text is hot! It’s all about heat and energy. The chapter starts out by introducing some concepts such as conduction, convection, and radiation. It then goes on to explain how insulation works. Next, it presents the following fun, easy-to-do experiment that is designed to build science process skills:

Lab: Keeping Warm

What you’ll need

  • 5 plastic cups
  • cotton batting
  • rubber bands
  • craft foam
  • bubble wrap
  • aluminum foil
  • hot water
  • thermometer
  • plastic wrap

Problem

Which kind of insulation will keep hot water warm the best?

04-01-a-cup

Experiment Procedure

  1. Wrap cotton batting around one of the cups. Be sure to cover the bottom and the sides of the cup. Use a rubber band to keep the batting in place.
  2. Prepare three more cups: one wrapped with craft foam, one with bubble wrap, and one with a double thickness of aluminum foil. Use rubber bands to secure each material. Do not wrap anything around the fifth cup.
  3. Predict which cup will best keep the hot water warm. Write down your hypothesis.
  4. Fill the cups with hot water and put a thermometer in each.
  5. Cover the top of each cup with plastic wrap, leaving the top of the thermometer sticking out.
  6. Measure and record the starting temperature for each cup.
  7. Leave the cups undisturbed for five minutes. Then measure and record the water temperature in each cup. Measure and record the temperatures again after another five minutes.
  8. Calculate the difference between the starting and ending temperatures for each cup.

Conclusions

  • Did your results support your hypothesis?
  • Which cup had the greatest change in temperature? Why?
  • Which type of insulated cup would you choose to hold hot chocolate? Why?

Follow-up

  • Use ice cubes instead of hot water to determine which insulation is best for keeping ice cubes from melting.

Labs like this one help build the skills that can turn your science student into a student scientist. Check out this lab and many other great skill-building ones in BJU Press Science 5.

Save

Filed Under: Successful Learning Tagged With: energy, experiment, heat, lab, science

A Chocolate Chip’s State of Matter

November 29, 2016 by Meredith

Chocolate chip cookies—does your family like them gooey or crunchy? Either way, I’m sure everyone is a fan of this delicious treat. Some of you probably have the homemade recipe memorized, but if you’re like me, the boxed cookie mixes are a go-to especially when baking with kids. (Thank goodness it keeps things simple yet still delicious.)

Getting kids involved in the baking process is quite valuable in the long term, but sometimes it’s extra messy at the beginning! Not only does it give them the opportunity to apply math and science skills, but your kids also can show the ability to follow specific directions. Getting kids involved with hands-on learning experiences allows them to take an active role in their education and makes the lesson memorable.

So why not bake chocolate chip cookies to teach about matter and its different states? You probably won’t have any complaints!

Things You’ll Need

  • Kitchen helpers
  • Bowls, utensils, cookie sheets, cooling racks
  • Your family’s favorite chocolate chip cookie recipe (or this recipe)
  • Ingredients for the recipe
  • Extra chocolate chips for “experimenting” (and eating)

This object lesson is a great time to use a “Know, Want to Know, Learned” (KWL) chart. It helps you guide the lesson as well as gauge your kids’ knowledge and then compares it to what they learned through the activity. Download this KWL chart for them to fill out.

KWL learning activity chart with chocolate chips

Know

Have your kids list what they know in the first column of the KWL chart. You can simplify the exercise to focus on a specific ingredient like I’ll do here with chocolate chips. The most obvious things your kids will likely write down are related to our senses (for example, shape, color, and state of matter). Place a few chocolate chips on the counter to help them get started if you’d like.

Want to Know

In this column on the chart, your children can put anything they want to learn about the chocolate chips. If they need help thinking past how many you’ll let them eat, suggest these questions for their chart.

  • How much does an average chocolate chip weigh? (You’ll need a kitchen scale for the answer.)
  • What causes chocolate chips to change their state of matter?
  • How much space (volume) does a chocolate chip take up?
  • What is the density of chocolate chips?
  • How long does it take a chocolate chip to change from one state of matter to another?
  • What is the melting point of a chocolate chip?

While your children fill out these first two columns on their KWL charts, you can begin gathering all the needed ingredients and kitchen supplies for the cookie recipe. Then let the mixing and measuring begin! As the cookies are baking in the oven, take time to work through the questions in the second column, helping your kids answer as many of them as possible.

Taking the cookies out of the oven gives you a great opportunity to explain the changes that matter can go through. For example, the chocolate chips go through a physical change. Your children can observe that the chocolate chips only change their state of matter from solid to liquid (melted) and back to solid again. Other ingredients (particularly the liquids) undergo a chemical change. These ingredients have lost their individual properties to become a new substance with different properties—the cookie!

Learned

The third column can be filled out as your children discover the answers to their questions during the baking time. Or they could fill it in while enjoying a nice warm cookie. Either way, be sure they record what they learned through this very scientific baking experience.

Learning charts like the one suggested for this exercise can be applied to many different subjects. Choose a holiday, historical event, literary genre, or another science topic to explore in this same simple way. Don’t forget about this downloadable KWL chart for your immediate use.

Inspiration for this science lesson came from chapters 3 and 5 of BJU Press Science 5 and Science 3, respectively. You can dig deeper into matter and find more teaching ideas in both of the corresponding Teacher’s Editions.

Filed Under: Successful Learning Tagged With: chocolate chips, KWL, learning chart, matter, science

  • « Go to Previous Page
  • Go to page 1
  • Go to page 2
  • Go to page 3
  • Go to page 4
  • Go to page 5
  • Interim pages omitted …
  • Go to page 8
  • Go to Next Page »

Primary Sidebar

As parents, teachers, or former homeschool students, we are passionate about homeschooling from a biblical worldview. We hope these teaching tips, fun activities, and inspirational stories support you in teaching your children.

Email Signup

Sign up for our homeschool newsletter and receive select blog posts, discounts, and more right to your inbox!

Connect with Us!

                    Instagram     

Read Posts on Specific Subjects

Early Learning
Foreign Language
History
Language Arts
Math
Science

Footer

Disclaimer

The BJU Press blog publishes content by different writers for the purpose of relating to our varied readers. Views and opinions expressed by these writers do not necessarily state or reflect the views of BJU Press or its affiliates. The fact that a link is listed on this blog does not represent or imply that BJU Press endorses its site or contents from the standpoint of ethics, philosophy, theology, or scientific hypotheses. Links are posted on the basis of the information and/or services that the sites offer. If you have comments, suggestions, questions, or find that one of the links no longer works, please contact us.

Pages

  • About BJU Press
  • Conversation Guidelines
  • Terms of Use & Copyright

Archives

© 2023 · BJU Press Homeschool