• Skip to primary navigation
  • Skip to main content
  • Skip to primary sidebar
  • Skip to footer

BJU Press Blog

  • Home
  • Shop
    • Shaping Worldview
  • Simplified Homeschool
  • Successful Learning

hands-on learning

Role-Play and a Colonial Activity

October 30, 2019 by Jenna

role-play to encourage learning
Children love role-play. Toys become props, and a jungle gym, a tree, or even the living-room furniture can become a stage for a unique role-play session. They play house, make up war games, or act out stories they’ve read or seen in movies. And they will use anything—and I do mean anything—that they’ve seen or learned in their role-play, even if it doesn’t exactly fit there.

I remember as a child creating stories with matchbox cars in a doll playhouse. I also remember having a Polly Pocket as a Star Trek tricorder in one hand and a Lego® phaser in the other. As a teen, I watched a group of first graders playing after school. One little girl, the leader, laid out the game they would play. She was drawing from her lessons, her favorite stories, and her own rather wild imagination. It was one of the most intricate and regulated children’s games I have ever seen. It didn’t make a lot of sense, but none of the other kids seemed to mind.

One of the best ways you can get your kids engaged in a lesson is to fit it into a story that they can remember. If you give them fodder for role-play, you’ll see them reusing what they’ve learned in any number of ways. Here’s an activity for creating a hornbook when you’re teaching about how children learned in the New England colonies.

Making Your Own Hornbook

This activity comes from the Heritage Studies 2 teacher edition (Lesson 52). In this lesson, children learn about dame schools and how hornbooks helped the kids in the colonies to memorize their letters and the Lord’s Prayer.
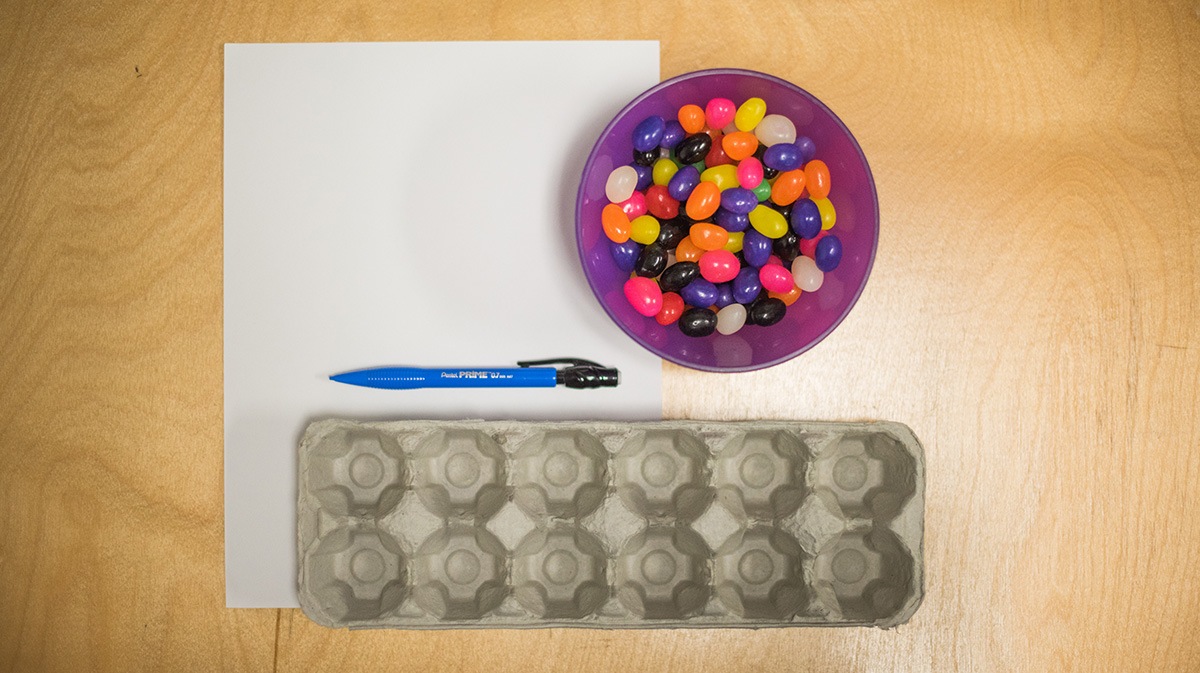
Materials

  • Hornbook pattern and text
  • 8½ x 11 sheet of stiff paper (construction paper, posterboard, or cardstock)
  • 4 brass fasteners
  • 24” length of string or ribbon
  • Sheet protector
  • Hole punch

Directions

  1. Print and cut out the hornbook pattern. Use it as a guide to cut the stiff paper into the shape of a hornbook.
  2. Cut out your sheet protector so it’s the same size as your hornbook. Hornbooks got their name because they were usually covered by a thin sheet of animal horn for protection. You’ll be using a this sheet protector instead of animal horn.
  3. Print and cut out the alphabet and Lord’s Prayer text.
  4. Punch a hole in each of the four corners of the sheet protector, text, and hornbook.
  5. Attach all three pieces together with brass fasteners.
  6. Punch an additional hole at the end of the handle.
  7. Thread the string or ribbon through the hole and tie the ends to make a big loop. Children would often wear their hornbooks around their necks or tied to their belts so they wouldn’t lose them and so they could study them throughout the day.

Role-Play Starters for Using Your Hornbook

Once the lesson is done, use these starters to get your kids’ minds engaged in play with the things they’ve just learned.

  • Pretend you’re the teacher at a dame school and you’re helping one of your students (e.g., a sibling or willing parent) use his or her brand-new hornbook.
  • Imagine you’re a child in the New England colonies and you have to wear your hornbook for the rest of the day.

But don’t be surprised! You may find sometime in the future that your child’s hornbook has become a fan, a pizza peel (the giant spatula used to put a pizza in the oven), or a crossing guard sign as your kids use it in their play.

Filed Under: Successful Learning Tagged With: hands-on activities, hands-on learning, Role-play

4 Reasons to Include Labs in Your Homeschool

August 16, 2018 by Ben

homeschool labs
Let’s get real for a moment. Teaching high school science is intimidating. I still remember how nervous my homeschool mom was about high school science. When I got to physics, we couldn’t find any labs kits. It was a nightmare. My dad helped me do one physics lab without a kit. That single lab cost us around $75 in supplies. We also spent hours creating the tool we needed for the lab. And when we finished, it didn’t even work. We couldn’t collect reliable data, and I never finished that particular lab.

So what could my mom do? She knew she needed to keep homeschooling through high school—and that she needed to include labs. Before I tell you how she made high school labs work for our family, here are four reasons she was committed to teaching with labs.

1. Creational Approach

Science at its core examines the works of God. We’re looking at what He did at creation and how His creation functions. As much as nature documentaries and science textbooks can evoke awe  and wonder at God’s creation, they’re only presenting what others have discovered by investigating God’s world. If we teach our kids science without incorporating close, hands-on examination of creation, we’re doing it wrong.

2. Deep Understanding

There were a number of chemistry concepts that I thought I understood. After all, I could ace the reading quiz. Then we did the lab over the concept. I discovered I didn’t understand it nearly as well as my quiz grade suggested. Labs are where head knowledge meets real-world experience and critical thinking. If I hadn’t completed the labs, I would have only superficial knowledge of chemistry without deep understanding.

3. Student Scientists

We aren’t teaching our children science so they can win on a TV game show or in a trivia competition. That would reduce science to superficial answers for esoteric questions such as, “Why is the sky blue?” That isn’t what science is at all. Instead, it’s a powerful tool for investigating and solving real-world problems. So when we teach our children science, we want them to act like junior scientists instead of students learning about science facts. Labs are where children act like scientists. This is especially true in high school science. We need labs to give our students the opportunity to behave like scientists.

4. Required Courses

Many states require lab sciences for high school graduation. And even if your state doesn’t, the college your son or daughter wants to attend may require it. And colleges may view non-lab science courses with suspicion. So how many labs should you include? A good rule of thumb is thirty hours of labs for each course. If you figure your setup time, lab time, and post lab time, each lab can last two to three hours. So aim for ten to fifteen labs.

Making Labs Happen at Home

So what did my mom do? She found kits. A number of kits helped us complete high school biology and chemistry. These kits made high school labs achievable. My sister and I could do most of these labs without any parental aid. They also made it affordable. We could have spent thousands of dollars if we had tried to pull together all the individual components that were in these kits. Instead, they cost my parents around $200.

For me, these lab kits made science creational, deepened my understanding, and gave me an opportunity to practice being a scientist.

At BJU Press, we’ve worked with Logos Science, Inc., to create lab kits for all of our secondary science textbooks and video courses. If you’re looking for something to help you bring labs to your homeschool, check out our Logos Science Kits.


Filed Under: Successful Learning Tagged With: biblical worldview, Creational Learning, hands-on learning, high school, high school transcript, Labs, Logos Science, science

Building Understanding with Negative Numbers

June 19, 2018 by Ben

negative numbers activity
By the time I got to junior high, I was really confused about negative numbers. At first it was simple, but concepts like multiplying negatives and absolute value taxed my understanding. Of course, I joined in on the chorus sung by every math student who doesn’t understand what he or she is supposed to be learning: “When am I ever going to use this?” Once I reached high school, I realized that negative numbers play a significant role in science. Today, negative numbers play a major role in my problem solving in home budgeting and in business.

So how can we set up children for success when they start using negative numbers so they can solve ever more complex problems? The answer is exposure, development, and mastery. We need to expose children to significant concepts well before they need them to problem solve. Next we need to develop their understanding on the path to mastery. Then, children will be ready for success later on.

Exposing a New Concept

I’ve learned that with negative numbers you need to expose your child to the concept in the elementary grades. A good time to begin is in the second half of fourth grade. At this point in their math journey, children are ready to explore negative values but not quite ready to perform mathematical operations with those numbers.

If you live in a northern state, your child may have been exposed to negative numbers through real-life winter temperature. In the South, we’re never sure what to do when the mercury drops below 20 degrees Fahrenheit, so my daughters will need some other exposure to real-world negative numbers.

Interacting with Negative Numbers

So how do we introduce children to negative numbers? As with all math concepts, we need to make observations with our children as we do hands-on activities—but how? What makes negatives difficult for children initially is that you can’t look at or touch negative three apples.

The best way to interact with negative numbers is with a number line. Try the following questioning strategy for introducing your child to negative numbers.

negative numbers activity materialsMaterials

You can use this printable, which includes the following:

  1. Number line (from negative 9 to positive 9)
  2. Markers to cut out

(BJU Press has also created a fourth-sixth grade manipulative kit that helps children learn this and other math concepts.)

Activity

  1. Give your child the number line and the markers.
  2. Ask your child to place the blue marker above the number 5. This will be a point of reference.
  3. Ask your child to place the red marker above the number 7. Ask, “Which of the two numbers is larger?” and “Is it farther to the left or farther to the right?” Point out that the larger number is to the right and the smaller is to the left.negative numbers activity
  4. Direct your child to take the red marker from 7 and put it above the number 1.
  5.  Ask, “Now which number is the larger?” and “Is it farther to the left or to the right?”negative numbers activity
  6. Have your child move the red marker above number negative 1.
  7. Ask, “What do we call that first number to the left of zero?” Your child might say, “Minus 1.” Explain that it is called negative one and that any time that negative symbol appears before a stand-alone number, it shows the number is less than zero.

Seeing the Math

This is a critical point because your child is going to compare two negative numbers. In your child’s experience, 7 has always been more than 1. But when both are to the left of zero (negative), the 1 is larger. This may seem obvious to an adult, but to a child it is counterintuitive. Allow your child to be “wrong” without correcting. You can set up the manipulatives so your child can see the difference.

  1. Leaving the red marker on the negative 1, ask your child to move the blue marker to negative 7. Ask, “Which number do you think is larger, negative 1 or negative 7?  Remember when we compared 1 and 5, which number was larger?  Was it farther to the left or farther to the right?”negative numbers activity
  2. Now ask your child to compare negative 1 and negative 7 again. Say, “Remember if the number is the farther to the right, it’s the larger.” Then ask, “Which number is larger, negative 1 or negative 7.”
  3. If your child is struggling with how this can be true, ask, “What would you prefer, to owe me one dollar or seven dollars?”
  4. Explain that a negative number is like owing money when you don’t have any money at all. It is less than zero. So the bigger the numeral, the smaller or less the value.
  5. Try comparing several more numbers.

negative numbers activityDeveloping Understanding

This is a basic introduction to negative numbers. In the next few days, have your child try these exercises to develop his or her understanding:

  • Give your child a number line with negative 10, negative 5, 0, and 10 marked. Have your child fill in the rest of the numbers.
  • Create greater-than and less-than exercises for your child, using negative numbers.
  • Give your child a set of four or five numbers (including both negative and positive) to arrange from smallest to largest.
  • If your child is familiar with coordinate graphs, try extending the x to the left beyond the zero and the y down below the zero.

Try a variety of these activities over the next week or two. Never take more than twenty minutes or so, and make sure you are keeping the time engaging.  You will want to revisit negative numbers again in fifth grade. Once you review what you’ve already covered, you can begin to introduce adding with negative numbers.

If you introduce, review, and develop a mathematical concept in the elementary years, your child will be prepared to be successful in junior high and high school math.

Filed Under: Successful Learning Tagged With: hands-on learning, homeschool, math, negative numbers, Number Lines

Learning Place Value with a Hands-on Activity

May 17, 2018 by Ben

place value cover
As a homeschool dad, I found it easy to fall into the trap of believing that my young child understood a number because she could say it and count to it. When my second daughter was in kindergarten, we enjoyed skip counting to a trillion by 100 billions. She felt like she grasped the number 1 trillion. But I was overlooking place value and the role it plays in deep understanding of foundational math concepts.

The concept of place value is crucial not only in gigantic numbers but also in more relatable numbers. It’s so easy for a six-year-old to recognize and count to a number such as 23 but not understand what the 2 and the 3 mean in practical, real-life experience.

One of the best ways to develop your child’s understanding of place value is through less-than and greater-than activities. Doing hands-on exercises develops number sense that will enable your child to solve real-world problems.

Preparing

  • Cut out twenty small squares of paper and ten strips of paper (ten squares each). [You can make strips and squares using the first page of the printable, or use the counting cubes from the Math 1 Student Manipulatives packet.]
  • Label three sheets of paper, the first as “Ones,” the second as “Tens,”  and the third as “Answers,” or use pages 2–4 of the printable.

place value activity materialsManeuvering

Give your child the following instructions orally, and guide him in carrying them out.

  1. Position the Tens paper and the Ones paper side by side with the Tens on the left. Make the number 32 on the top half of the Tens paper and the Ones paper.
  2. Skip count the tens aloud (i.e., count 10, 20, 30).
  3. Count the ones aloud (i.e., count 1, 2).
  4. Write the number on the answer sheet (i.e., 32).
  5. Now make the number 23 using the bottom half of the Tens paper and the Ones paper.
  6. Skip count the tens and count the ones.
  7. Write the number immediately below the 32 on the answer sheet (Example 1).

place value onesplace value more onesplace value answersObserving

This is the key point in the activity. You’re ready to ask your first-grade child to make some comparisons based on what he’s observing with the manipulatives.

  1. Ask, “Which group is bigger, the one on the top (32) or the one on the bottom (23)?”
  2. Follow up with, “Which one has more ones?” and “Which one has more tens?”
  3. Finally ask, “Which place should you look at to determine which number is bigger (greater), the ones place or the tens place?” Have your child respond by circling the correct digit on the answer sheet.

Repeating

  1. Remove the strips and squares from the Tens and Ones pages. Go through the process of building 19 and 45 but without the counting steps.
  2. Tell the child to write the numbers side by side with a box in between (Example 2).
  3. Ask which number is larger. The child should indicate his answer in the box by drawing the < symbol in the box.
  4. Now have your child pick two numbers (greater than 10 and less than 50) to repeat the activity.
  5. Have your child guess which number is larger before building the two numbers.
  6. Guide him in writing the numbers with a box in between and then drawing the correct symbol in the box (Example 3).

place value counting onesplace value more answersPracticing

Write out five or six less-than or greater-than problems for your child to practice what he just learned. Encourage him to make each number on the Tens and Ones pages before writing in the greater-than or less-than sign.

Try to spend about twenty-five minutes on this activity before moving on to something else.

Do the the activity again on another day with different numbers to continue developing your child’s number sense and understanding of the critical role that place value plays in determining how large a number is.place value finished answers

Filed Under: Successful Learning Tagged With: hands-on learning, math, Math 1, number sense

Help Your Second Grader with Division

April 19, 2018 by Ben

hands-on division activity
As your homeschool child becomes proficient in multiplication, it’s time to introduce division. Typically, children become comfortable with division in their third-grade year of math. But the end of second grade is a good time to introduce the concept.

Since math models God’s creational order, it helps to introduce division with physical objects. Using objects from God’s world to touch, play with, and observe, we can help children develop a number sense that fosters deep understanding.

Guided Hands-on Discovery of Division

Here’s a fun hands-on activity to introduce division in a non-pressure way. All you need is an empty egg carton with the lid removed and twelve small objects. I used jelly beans, but  dried beans, beads, or any other small household items will work.

Remember, the goal is to develop number sense that leads to deep understanding. We don’t want to overwhelm our children.division activity materials

  1. Have your child place all twelve jelly beans in the egg carton, putting two in a compartment until all the jelly beans are used.
  2. Ask, “How many jelly beans did we start with?”
  3. Ask, “How many compartments are in use?” To find the answer, he can count out the six compartments that have two jelly beans.dividing jelly beans
  4. Ask “How many jelly beans are in each of these compartments? It’s the same number in each one.”
  5. Dump out all the jelly beans and focus on the compartments.
  6. Direct your child, “Fill four compartments so that each compartment has the same number of beans.” Make sure your child feels free to make mistakes at this stage. Have him keep adjusting the number of beans until four compartment hold three beans each.divided jelly beanscounting jelly beans
  7. Say, “This time fill three compartments so each compartment has the same number of beans. Were we able to still use all of our beans? How many are in each compartment?”
  8. Finally, ask, “How many compartments would we use if we put six jelly beans in each compartment?”
  9. After your child makes a prediction, allow him try it out.
  10. Once your child becomes comfortable with the process, explain that he has done division! Division is simply making equal groups or sets out of a larger number. So we could say that 12 beans divided into 6 sets equals 2 beans in each set. Or 12 beans with 3 beans in each set makes 4 sets.
  11. Now write out the equations that your child has already worked out with beans: 12 ÷ 2 = 6, 12 ÷ 3 = 4, 12 ÷ 4 = 3, and 12 ÷ 6 = 2.
  12. As you write out each equation, have your child recreate it with the jelly beans. This will help your child visualize what the equations mean.

writing out problemsworking it outSustained Learning

This activity shouldn’t take more than twenty minutes. Over the next couple of days, review with your child, and let him practice independently. Keep the egg carton and jelly beans handy, so your child can work out the problem hands-on each time. After he works a problem out with the jelly beans, he can write down his discovery.

Remember, you’re not trying to guide your child to achieve mastery of division right now. You’re introducing it ahead of third grade, when your child will spend more time developing skill with division. So after a week, move onto another math concept your child has more experience with.

My wife and I have found that these interactive math activities ignite a joy of learning for our children. It turns play into guided discovery and develops a strong number sense in our children. Try this activity out toward the end of your child’s second-grade year.

Filed Under: Successful Learning Tagged With: Christian Homeschooling, Guided Discovery, hands-on learning, Interactive Learning, math, Math 2

  • Go to page 1
  • Go to page 2
  • Go to page 3
  • Go to Next Page »

Primary Sidebar

As parents, teachers, or former homeschool students, we are passionate about homeschooling from a biblical worldview. We hope these teaching tips, fun activities, and inspirational stories support you in teaching your children.

Email Signup

Sign up for our homeschool newsletter and receive select blog posts, discounts, and more right to your inbox!

Connect with Us!

                    Instagram     

Read Posts on Specific Subjects

Early Learning
Foreign Language
History
Language Arts
Math
Science

Footer

Disclaimer

The BJU Press blog publishes content by different writers for the purpose of relating to our varied readers. Views and opinions expressed by these writers do not necessarily state or reflect the views of BJU Press or its affiliates. The fact that a link is listed on this blog does not represent or imply that BJU Press endorses its site or contents from the standpoint of ethics, philosophy, theology, or scientific hypotheses. Links are posted on the basis of the information and/or services that the sites offer. If you have comments, suggestions, questions, or find that one of the links no longer works, please contact us.

Pages

  • About BJU Press
  • Conversation Guidelines
  • Terms of Use & Copyright

Archives

© 2023 · BJU Press Homeschool