At a yard sale several months ago, I bought a worktable. It was mammoth—almost eight feet in length. It barely fit in our minivan. It was also incredibly heavy. I really had no idea where I was going to put this monstrosity. I wasn’t even sure how we would get it inside the house. But I knew that this ten-dollar table was perfect for what I wanted it to be—an art station.
My older daughters, four and six years old, love doing art projects. I have encouraged their interest because I know that doing art projects helps young children learn about colors and shapes, boosts fine motor skills, and allows them opportunities to express their creativity.
But paints spill. Glitter is almost impossible to contain. Confetti-sized pieces of paper easily litter the floor. Add a toddler in the mix, and the mess just gets worse because suddenly that toddler is trying to eat all the crayons and pieces of paper. This scene repeated itself frequently at my house, so I knew we needed a space that would contain the mess and yet allow for the creativity. And I knew that there wasn’t much household budget for setting up an art station, so whatever I ended up doing, I needed to do it inexpensively.
If you want to set up a creative space for your kids, here are some ideas that worked really well for us when we set up our art station.
1. Providing a surface
You don’t need an eight-foot worktable in order to set up an art station. Use an old desk, a sewing table, or even an end table. Just make sure that whatever surface you choose is sturdy.
2. Displaying your kids’ artwork
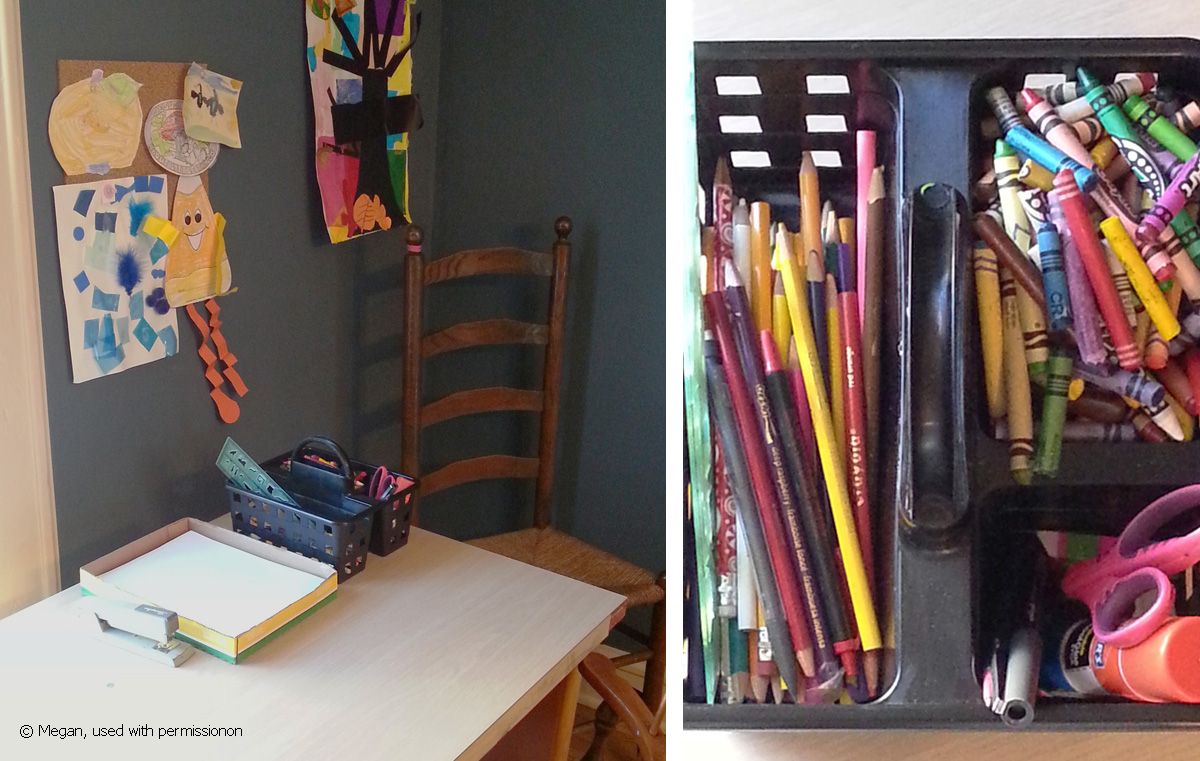
I bought a four-pack of cork squares in the office supply section of a discount store. I mounted one on either side of the worktable so each of my two daughters could have a place to showcase her creations.
3. Making cleanup a breeze
Messes will happen, so making it easy to clean them up is key. My worktable has a laminated plastic top, so it’s really easy to wipe down. But if your surface is solid wood, you might want to consider covering it with a clear vinyl tablecloth to make cleanup easier. I bought a couple of small wastebaskets at the dollar store and placed one on either side of my table to make trash pickup easy. I also bought some very inexpensive cookie sheets (I found them for as low as $.88 each), which have been wonderful for containing glitter, colored sand, and other messy (but fun!) supplies. Small foil baking dishes can help contain paint and yet allow little ones to experiment with color mixing.
4. Stocking art supplies
I keep crayons, colored pencils, child-sized scissors, and white paper out at all times. I bought shower caddies at the dollar store, and they have helped keep everything neat and organized. Currently, our paper is stored in shallow boxes that we picked up at the grocery store for free. I also keep the following art supplies on hand, but my children have to ask to use them.
- Markers
- Glue sticks
- Glue bottles
- Clear tape
- Glitter
- Glitter glue
- Stickers
- Construction paper
- Watercolor paper
- Washable poster and watercolor paints (I highly recommend Crayola® paint because it comes off anything)
Another way to keep costs low but creativity high is by collecting a box of “junk” that your kids can use to create things with. Here’s a list of some things we have used, but the possibilities are limited only by your imagination!
- Scraps of tin foil
- Buttons
- Coffee filters
- Paper plates
- Ribbon and fabric scraps
- Plastic drinking straws
- Empty oatmeal canisters
- Small empty boxes
- Scraps of wrapping paper
Our art station is set up along a wall in our dining room, and my kids spend hours there every week. They’ve created bookmarks, produced original drawings, engineered paper airplanes—they even made their own chore charts! Below are some pictures of our space that I hope will help inspire yours.
